
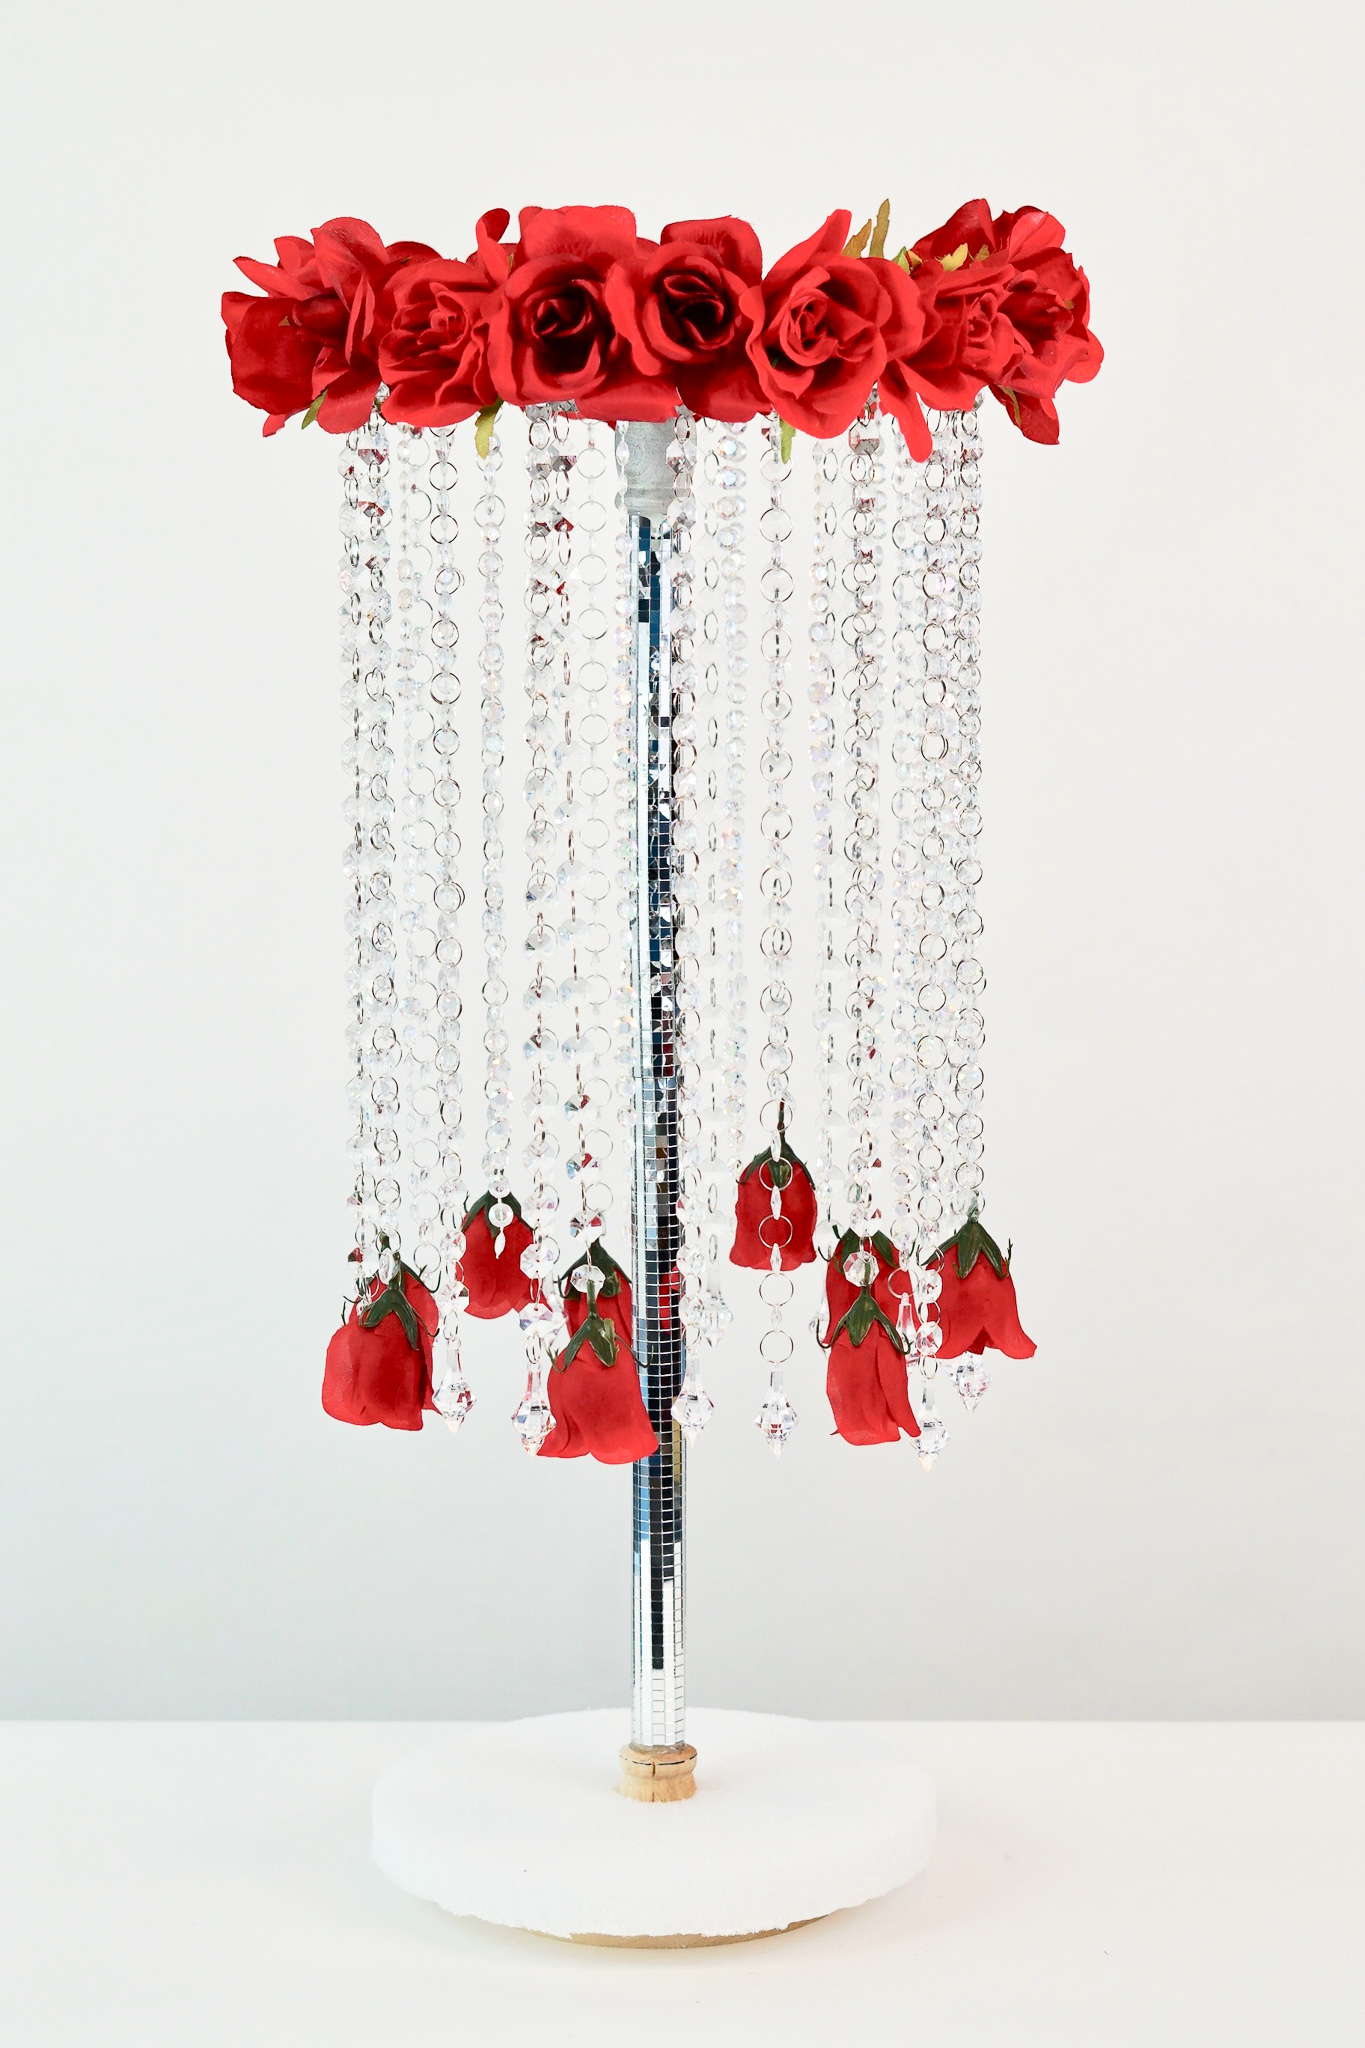
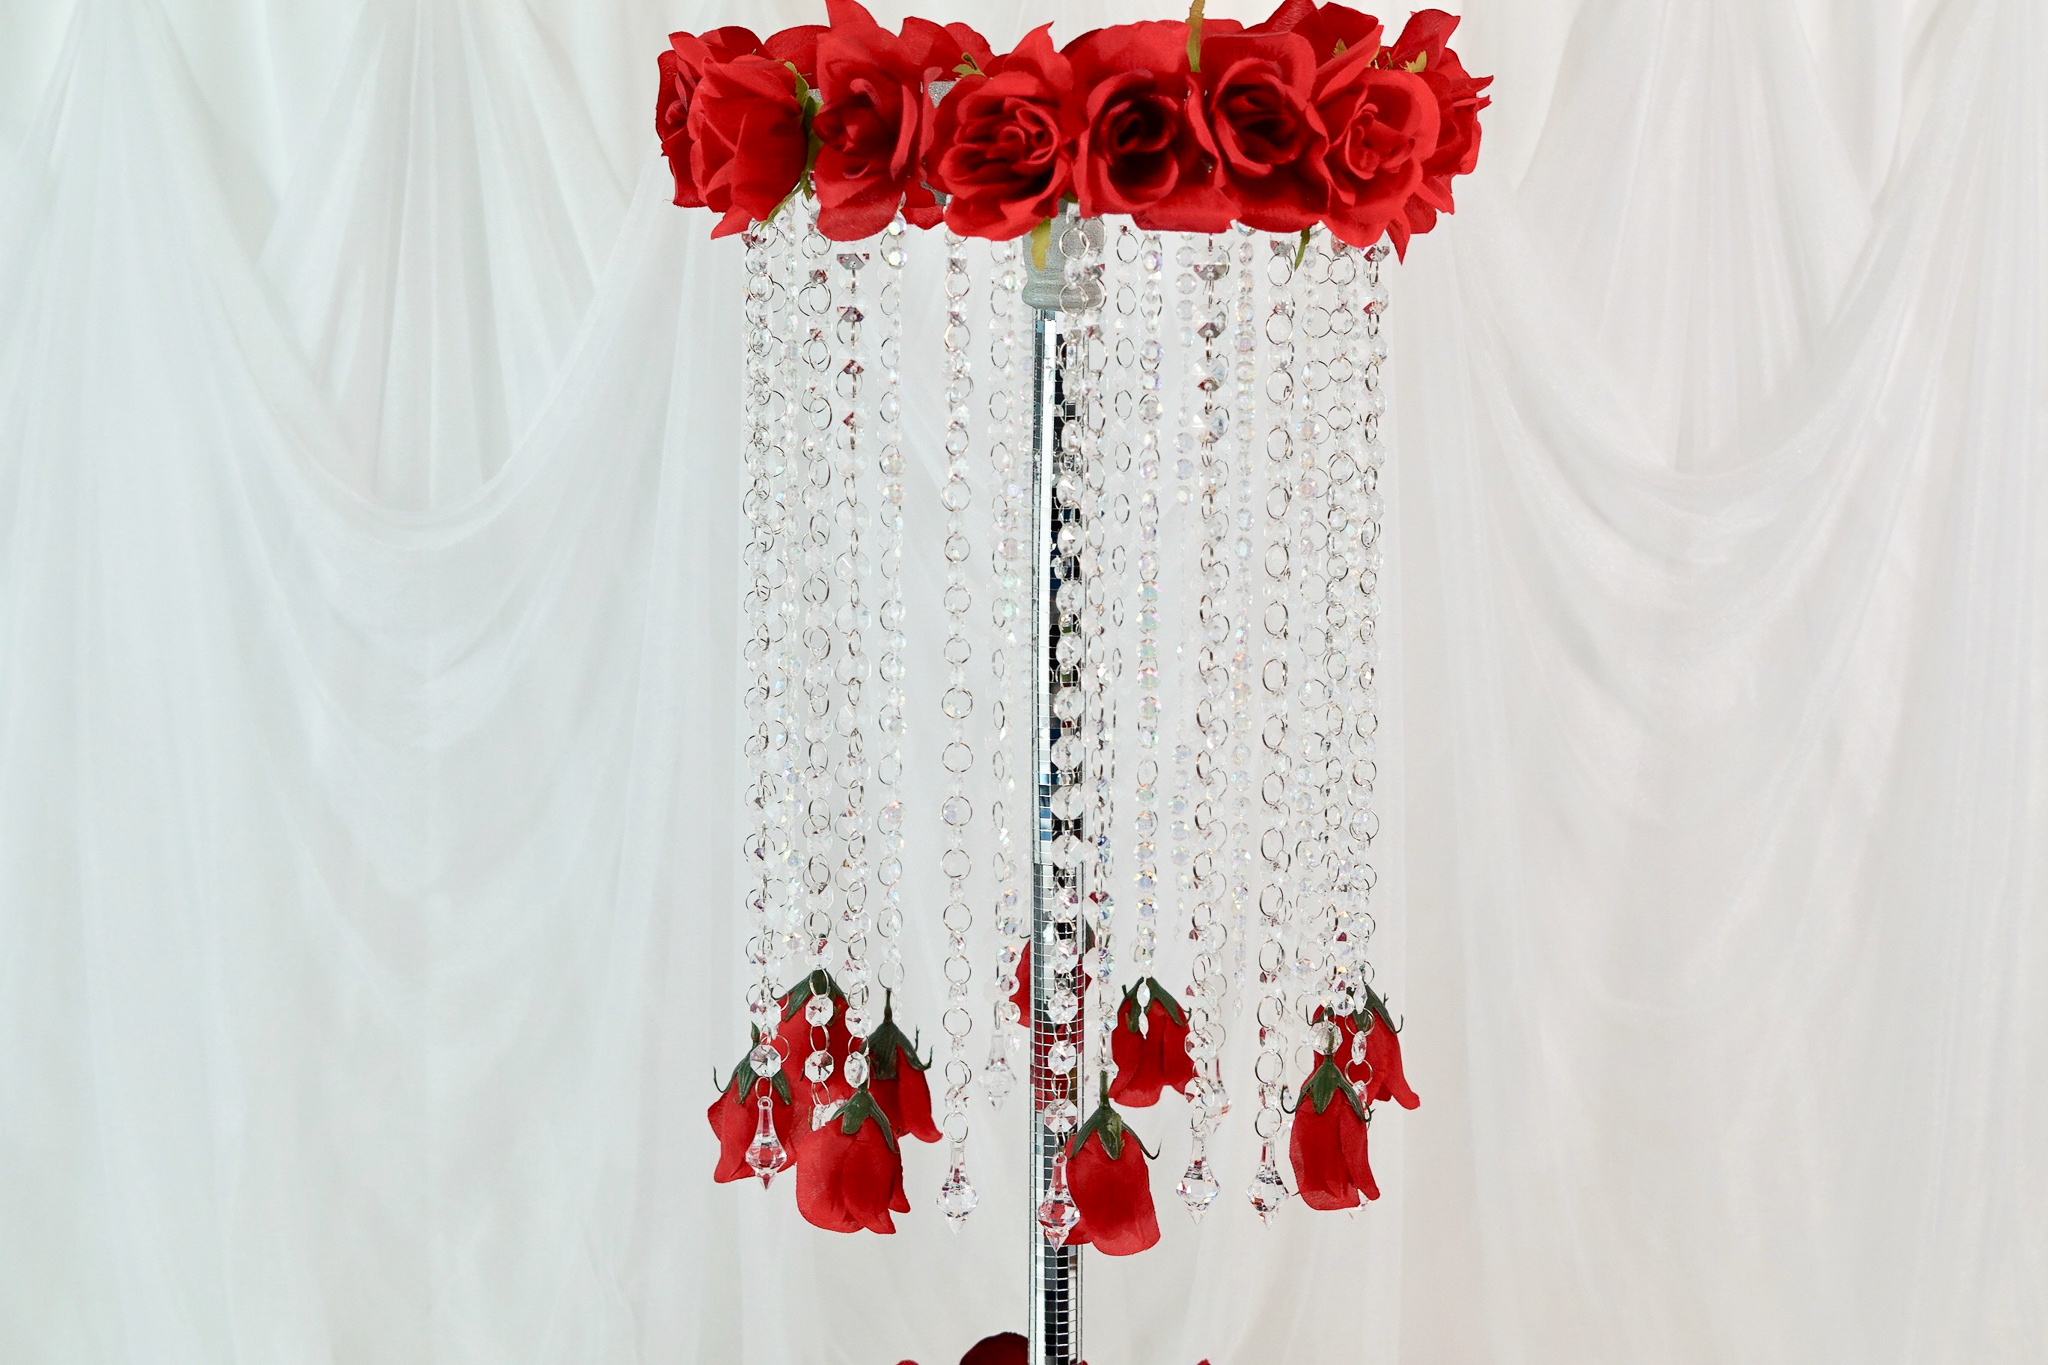
Bring your wedding decorations to new heights with this DIY Tall Rose Chandelier Wedding Centerpiece. This gorgeous creation has beautiful red and burgundy roses along with dazzling gem garland strands. The mirrored tile finishes this eye-catching elegant wedding creation. The breathtaking appearance will absolutely captivate your guests as they stare at it in awe. No one will ever know you made this wedding centerpiece yourself. So let’s get started! For video instructions, please check out the video tutorial below!
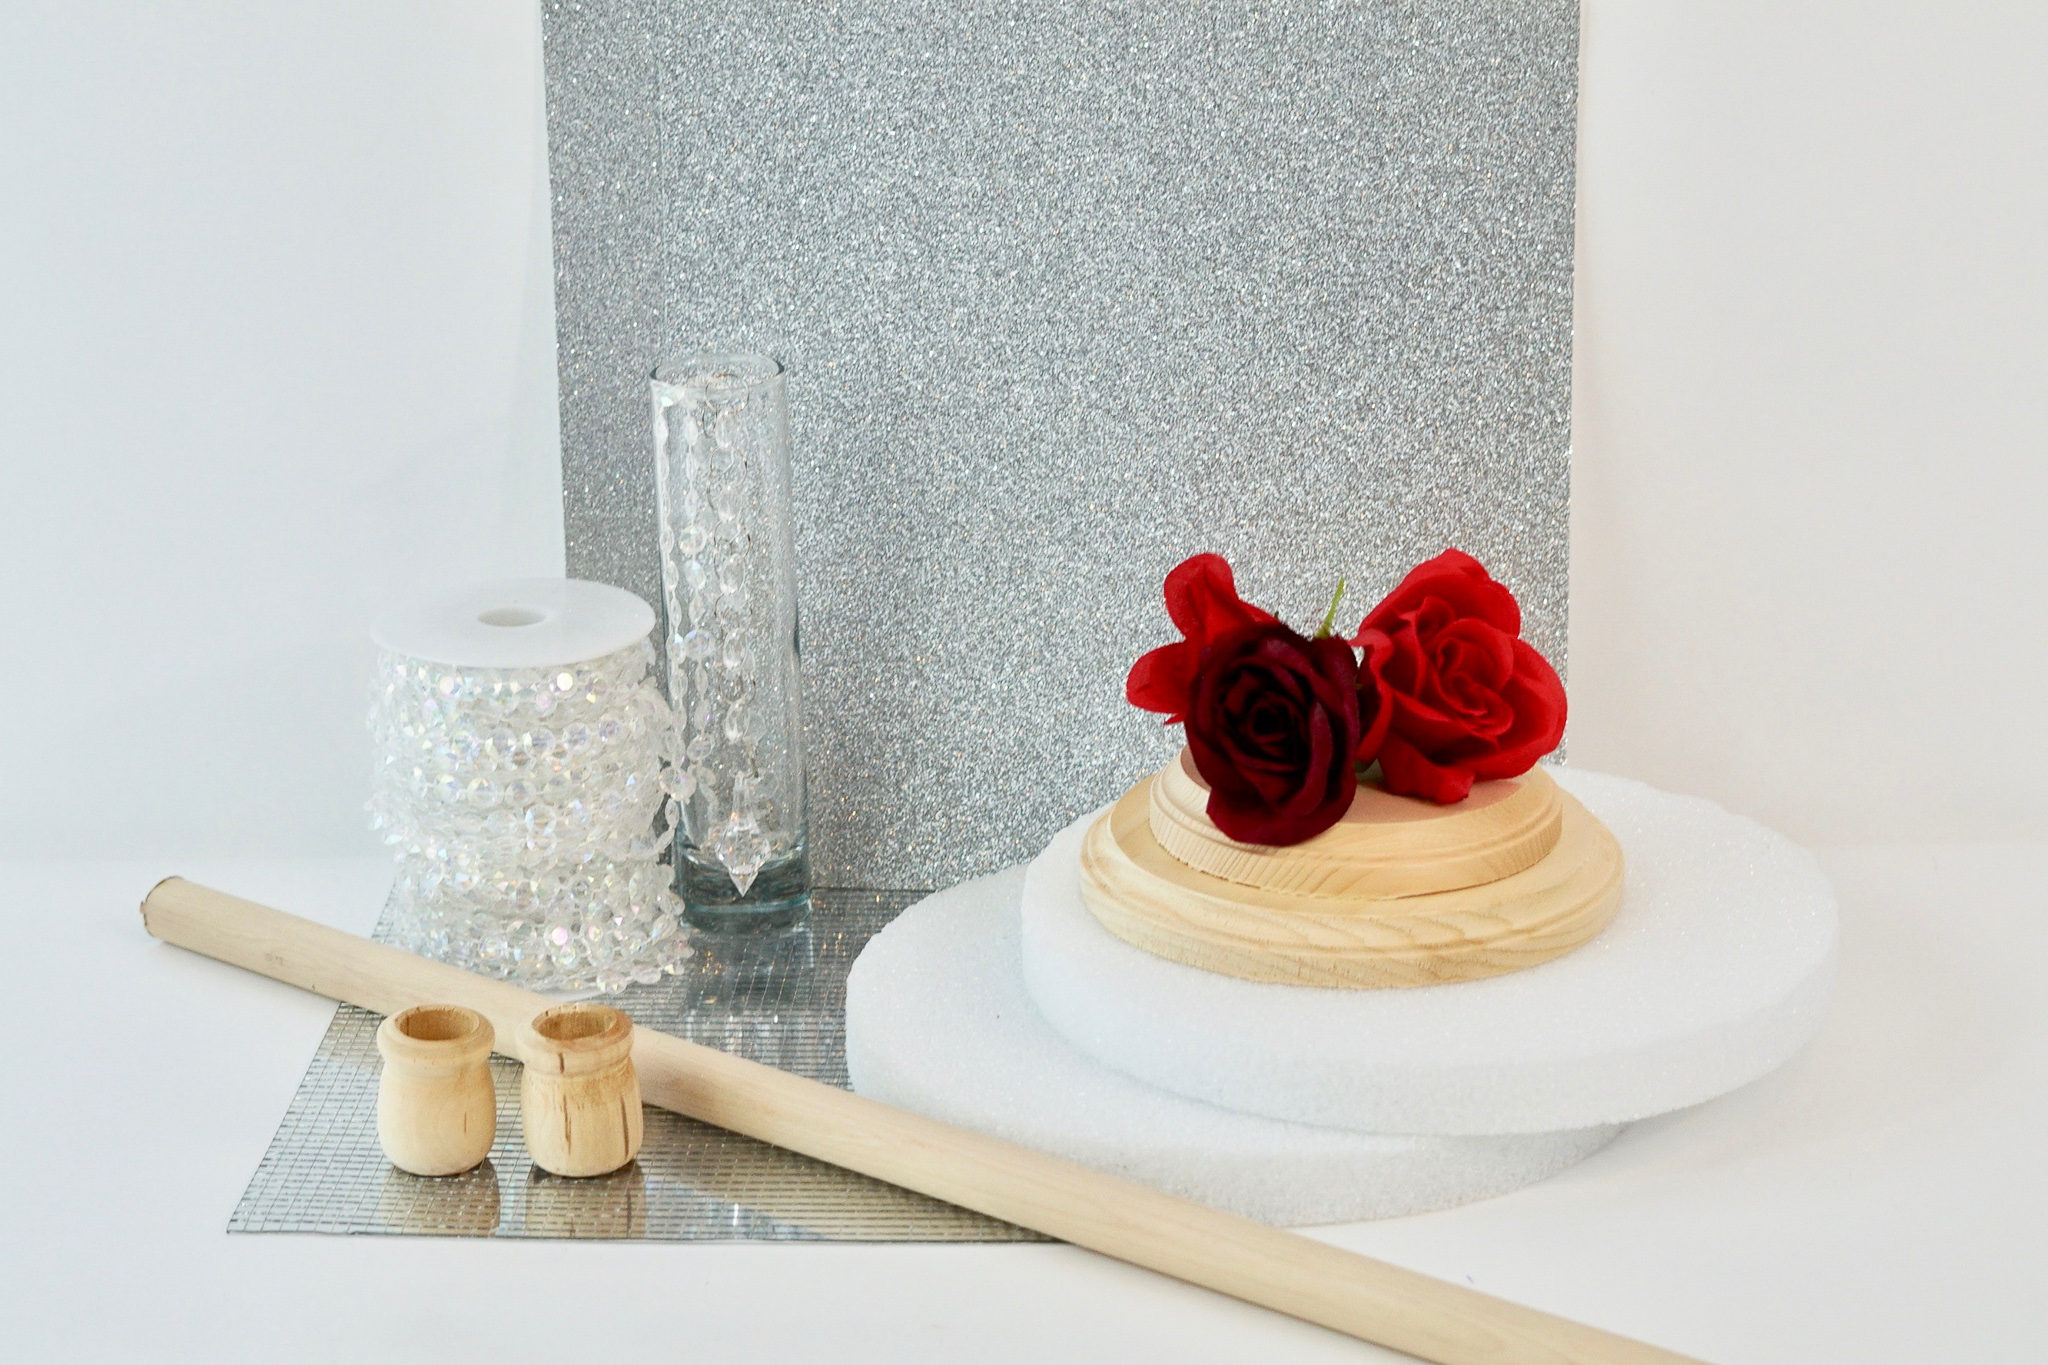
SUPPLIES:
7-Stem Faux Rose Bud Bushes, 13.5 in
6-Stem Queen Rose Bushes, 15.5 in.
Burgundy Rose Bush
Foam Disc – 10”
Round Wood Plaque – 6 3/4”
Hardwood Dowel – 7/8”
Birch Wood Candle Cups – Extra Large
Silver Solid Glitter Scrapbook Paper – 12″ x 12”
Floral Pins
Glitter Silver FolkArt Enamel Acrylic Paint
SunRise 120+ Pieces Clear Acrylic Chandelier Drops
Crystal Clear Acrylic Bead Garland Chandelier
Clear Diamond Garland Strands Crystal Beads, 1 Roll of 99 ft
Mirror Sheets Mosaic Sticker
Wood Stik Glue sticks for Wood Projects
PROJECT COST *$87.02 (Some supplies cover more than 1 centerpiece) * Prices fluctuate depending on coupon discount amount. *Price based on current sale cost. (taxes not included)
For written instructions, please continue reading below:
How To Make a DIY Tall Chandelier Rose Wedding Centerpiece
Directions:
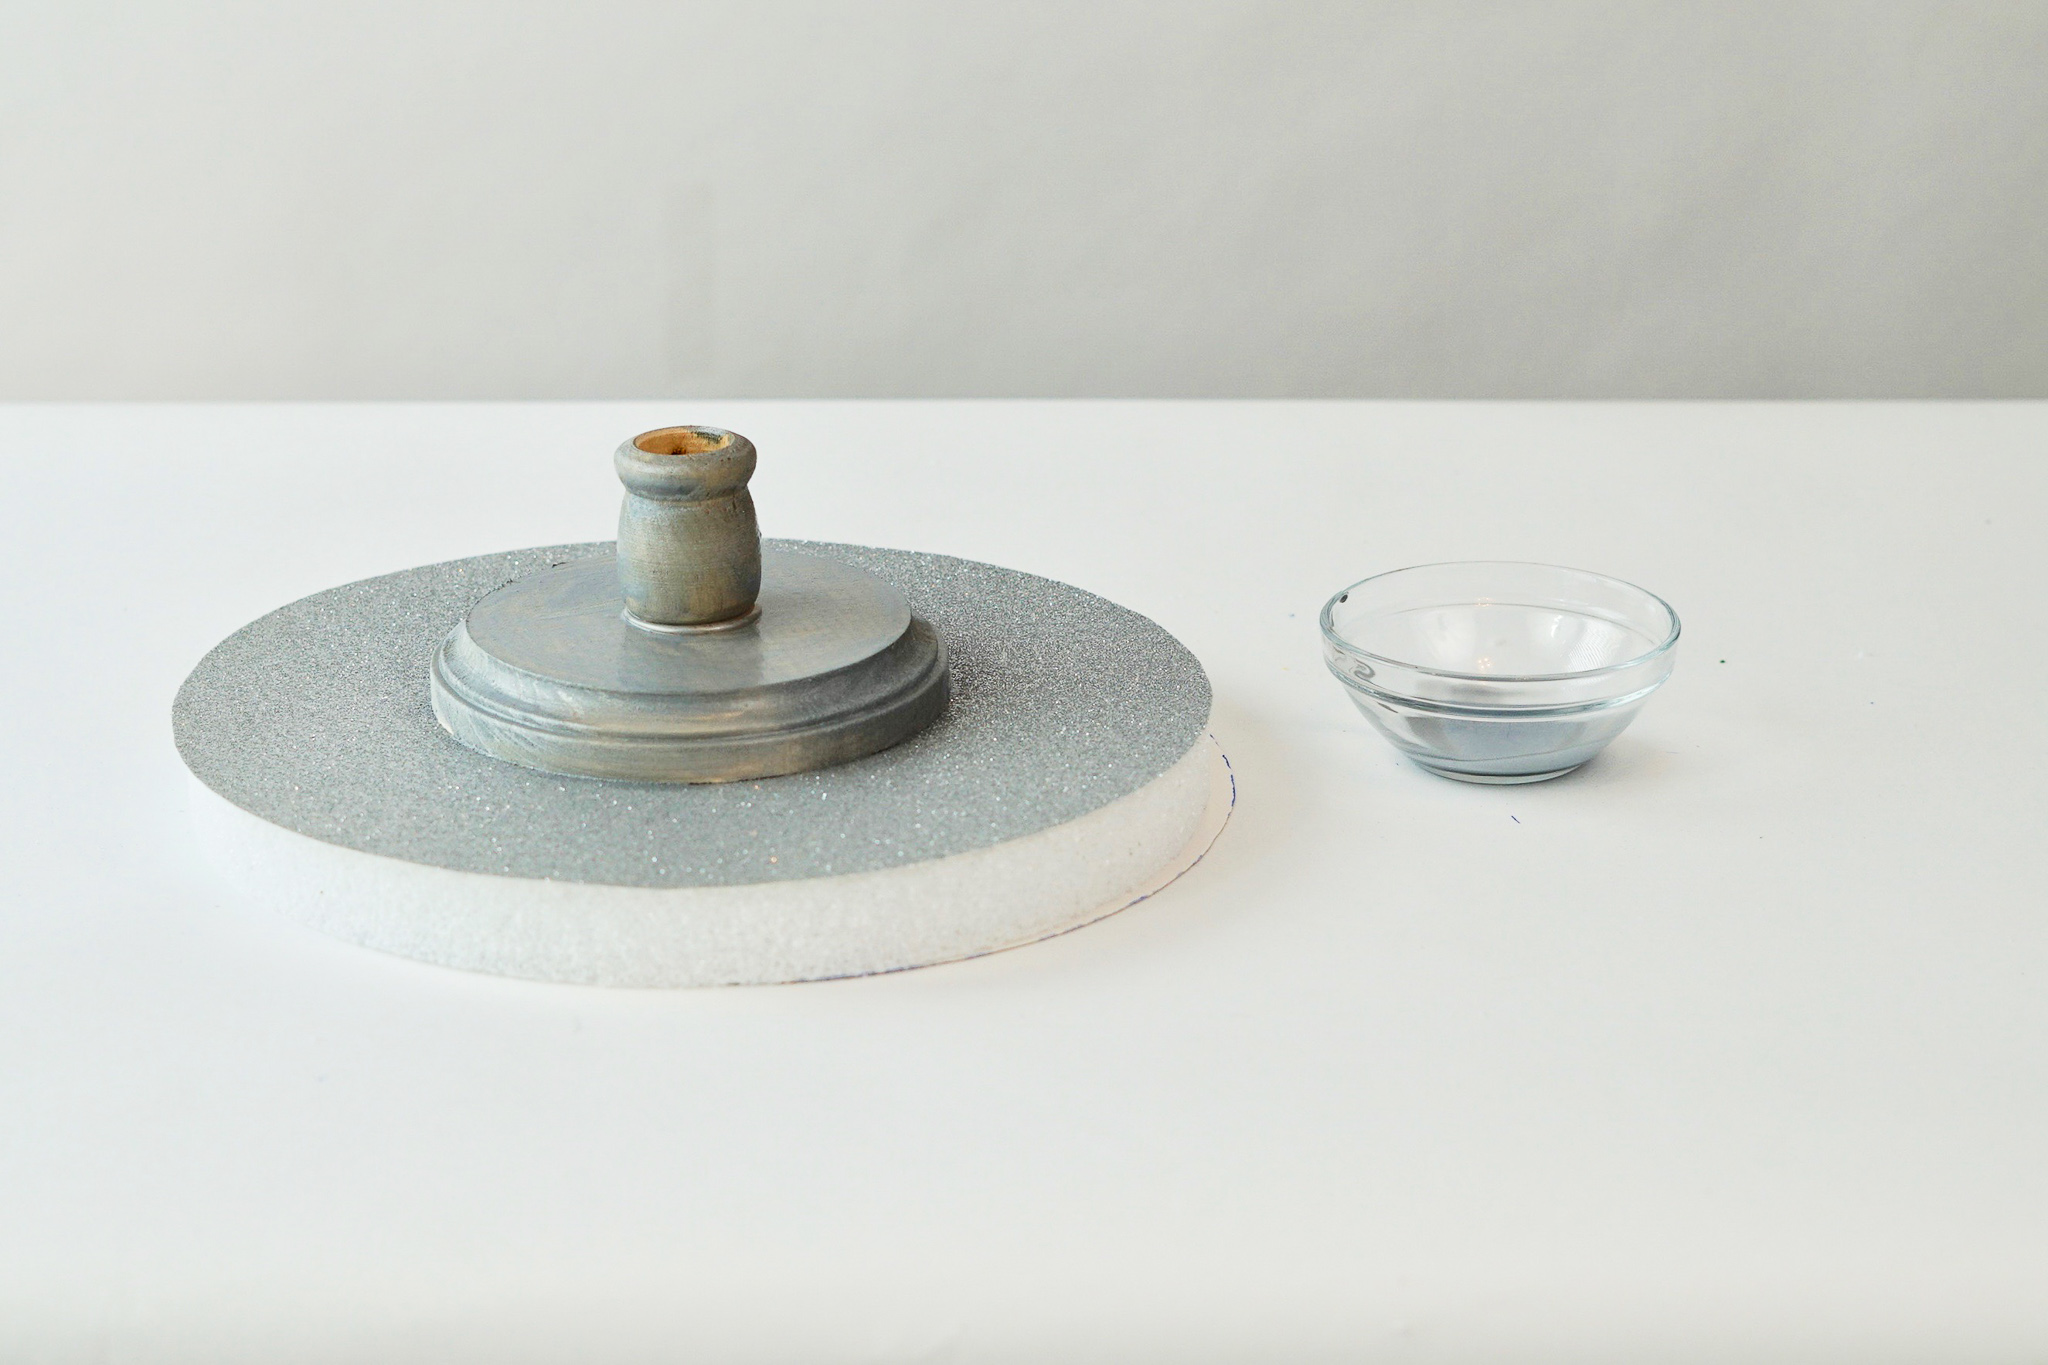
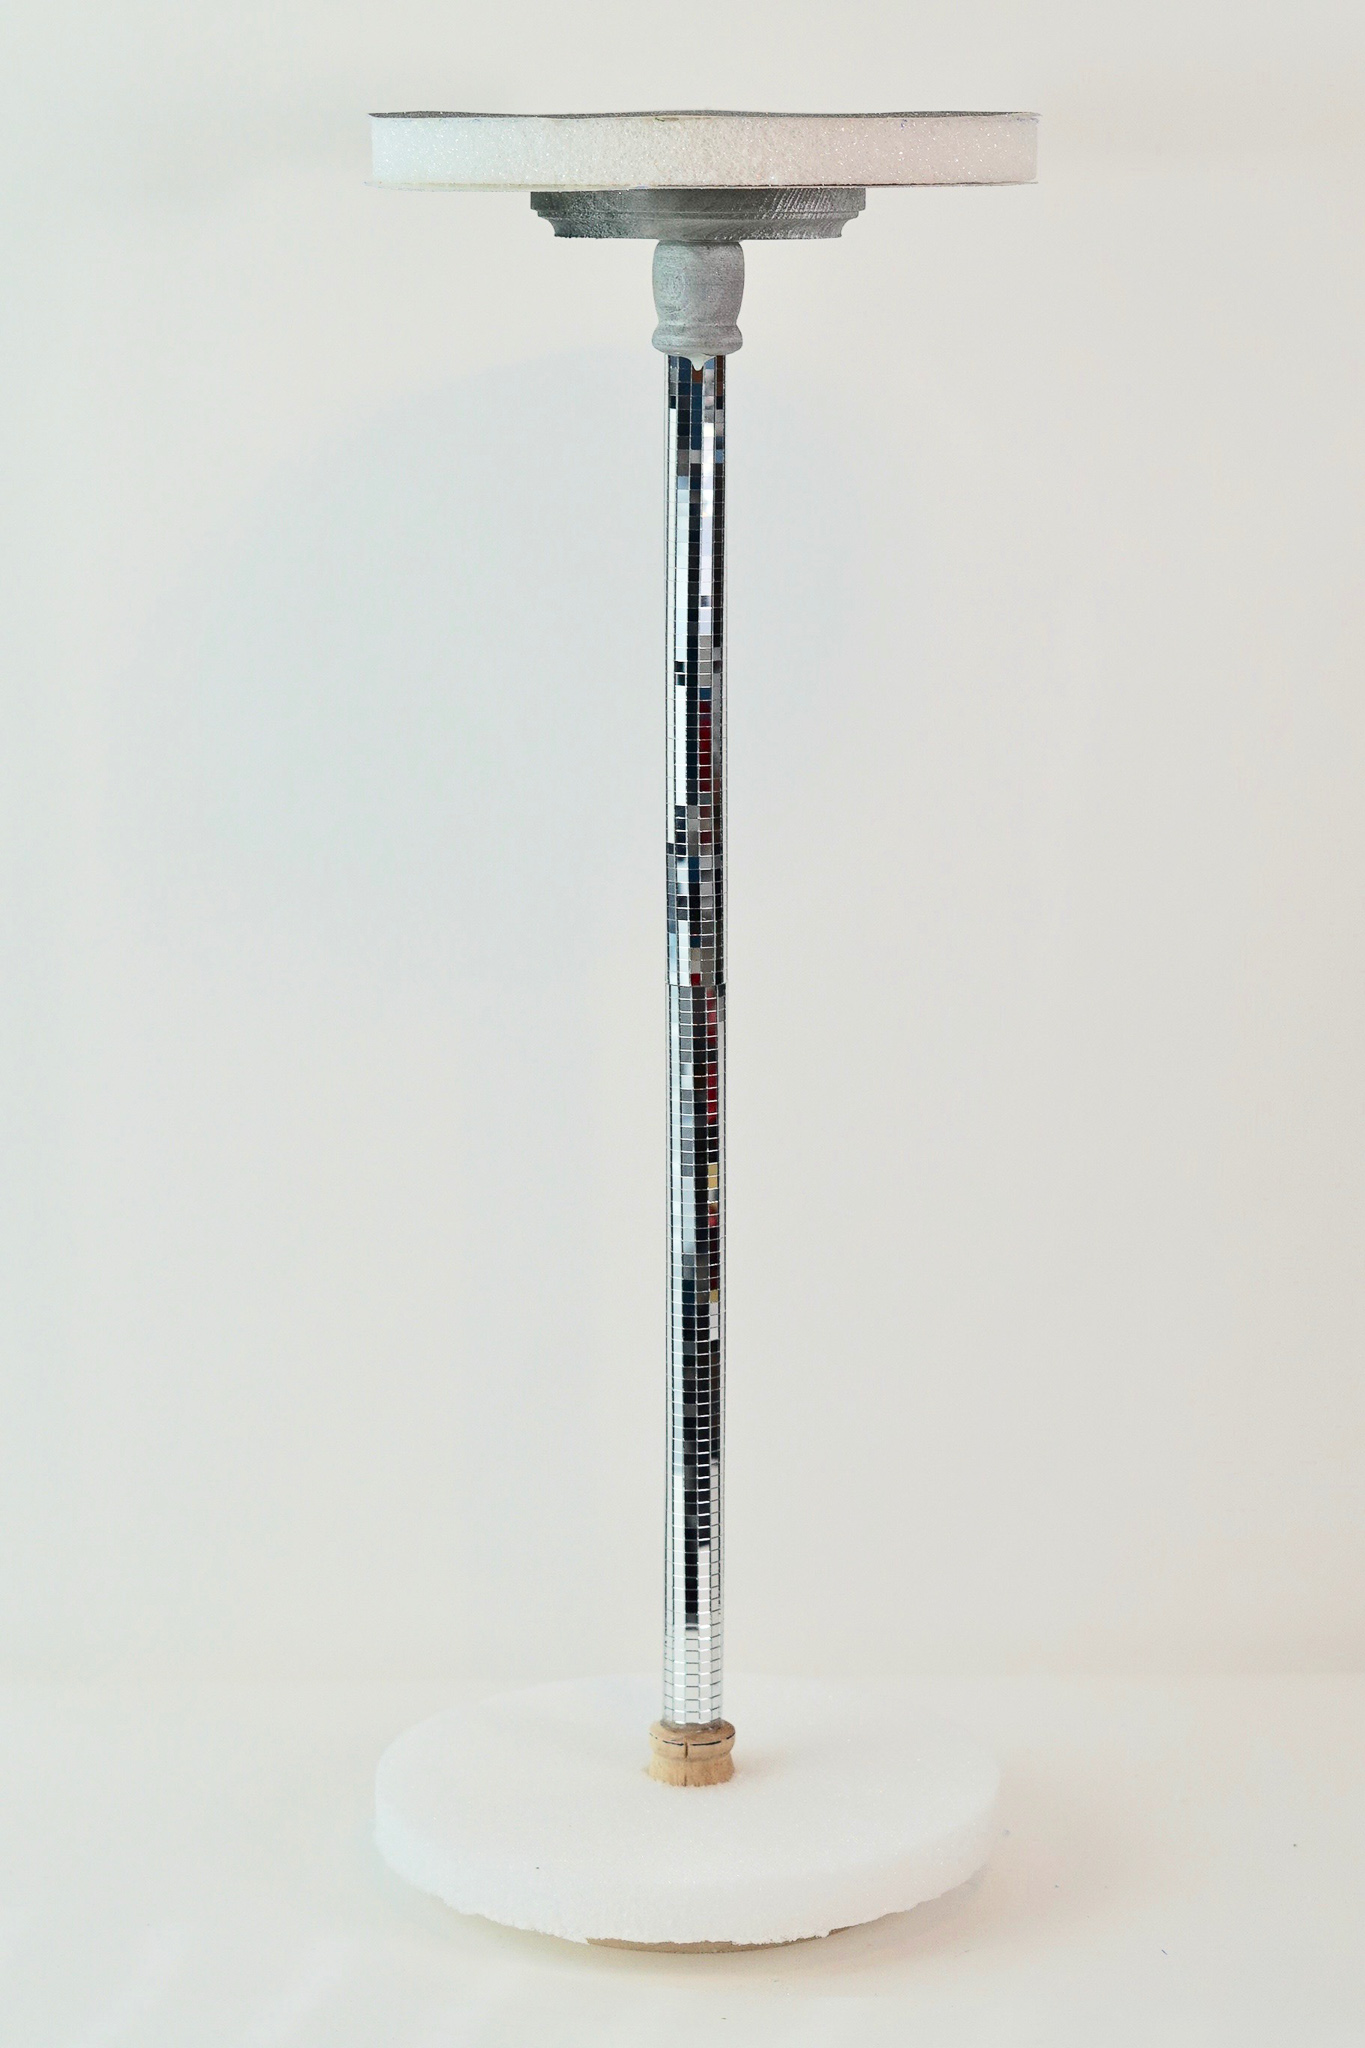
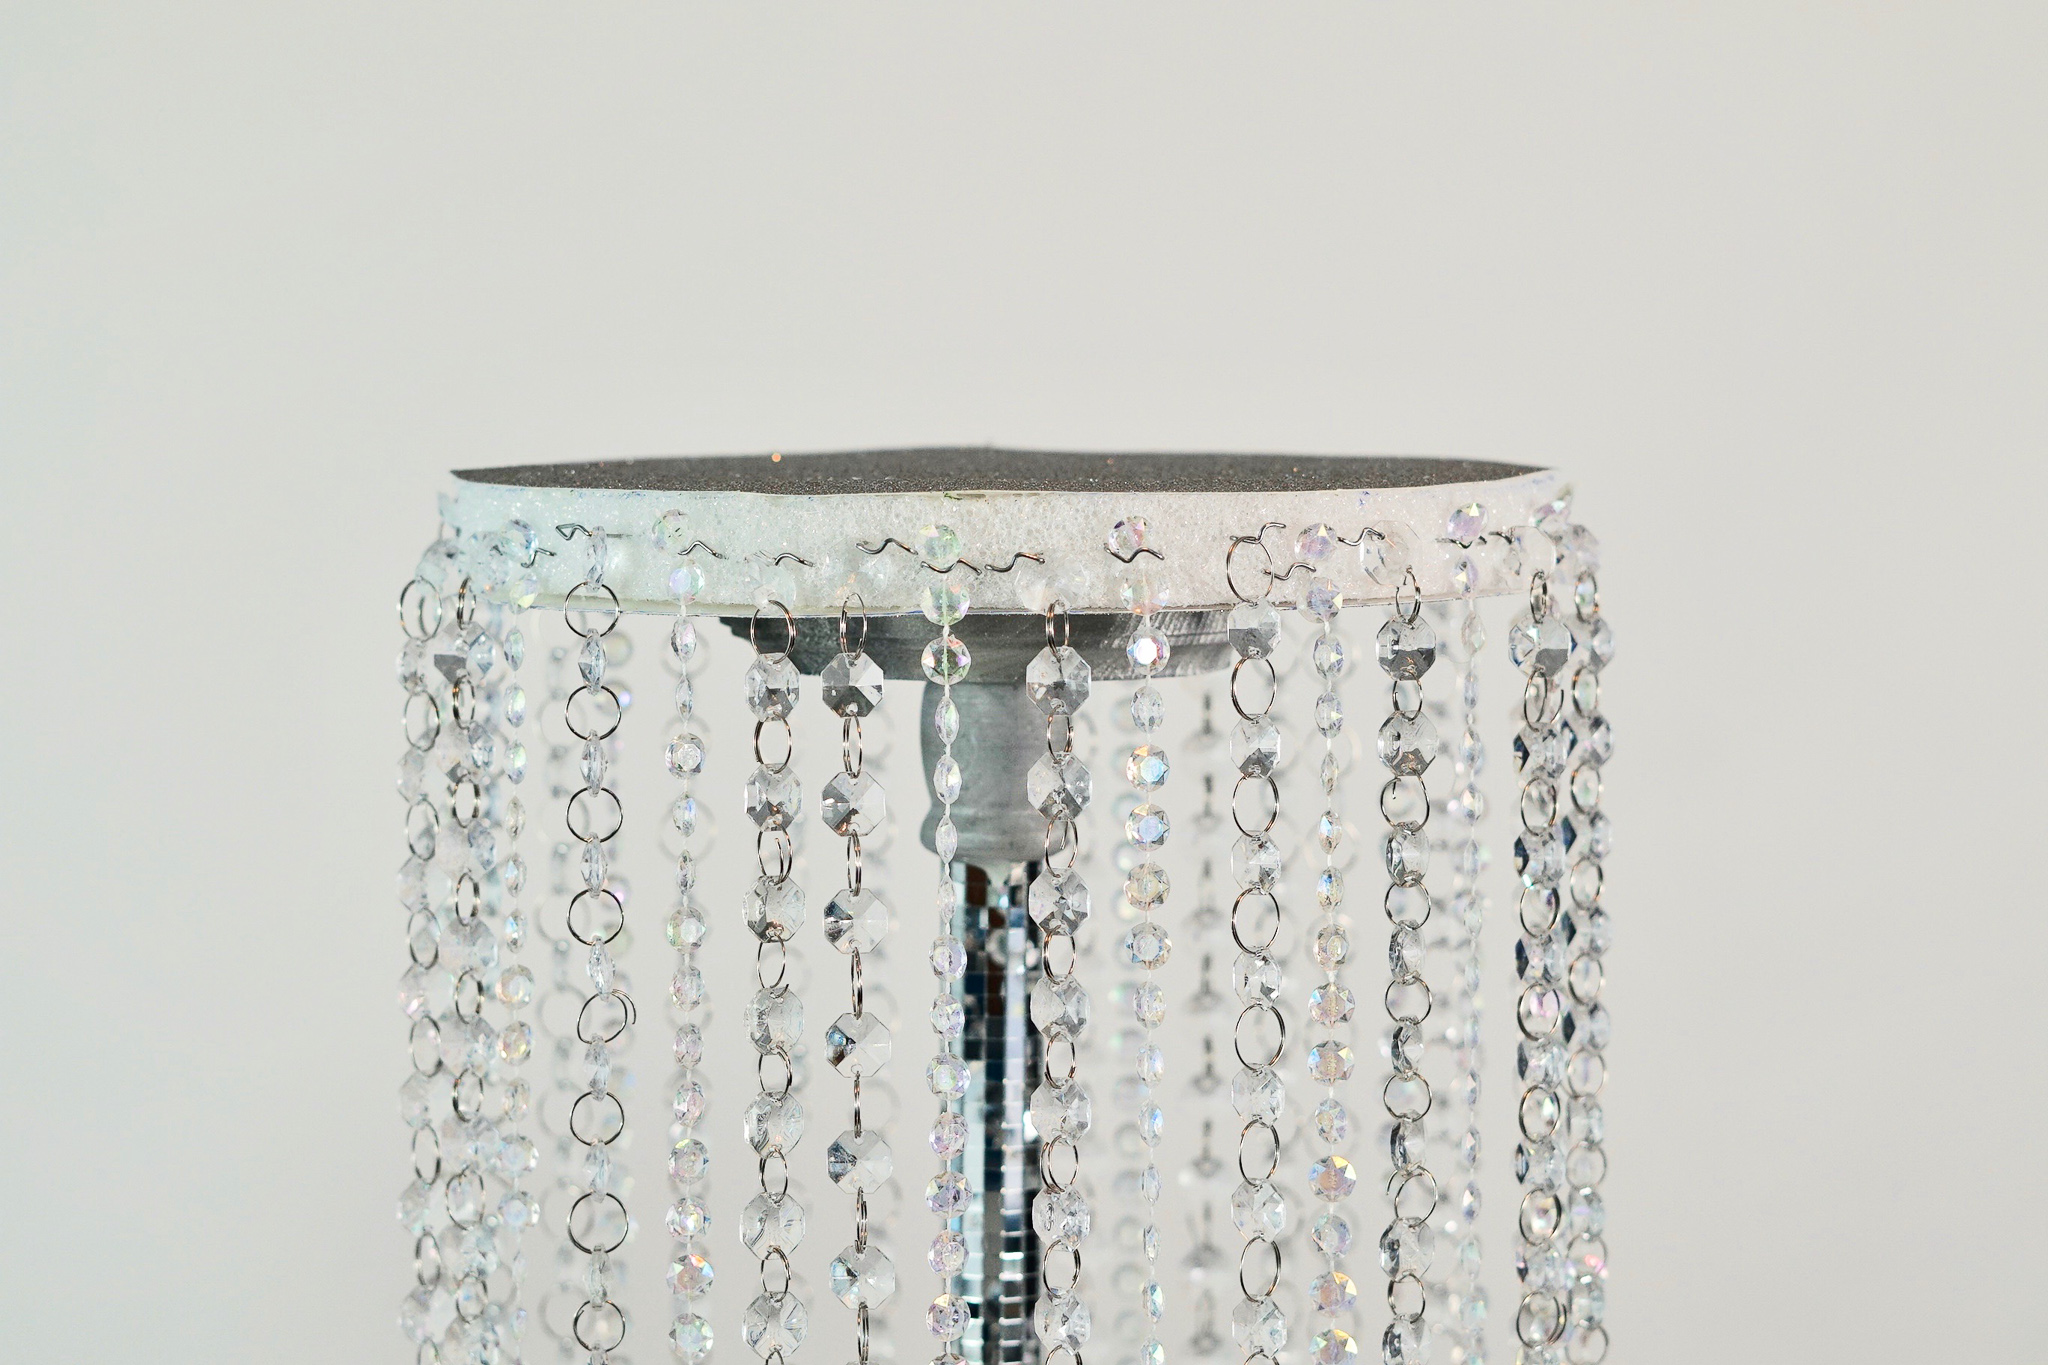
STEP 1: To make the construction for your centerpiece, first temporarily attach the extra large birch wood candle cups to both ends of the 7/8″ wooden dowel. Mark around the cups with a marker and then measure around the wooden dowel and cut the area you need. Remove the sticky back of the mosaic tile and then attach it to the wooden dowel. [See Video]
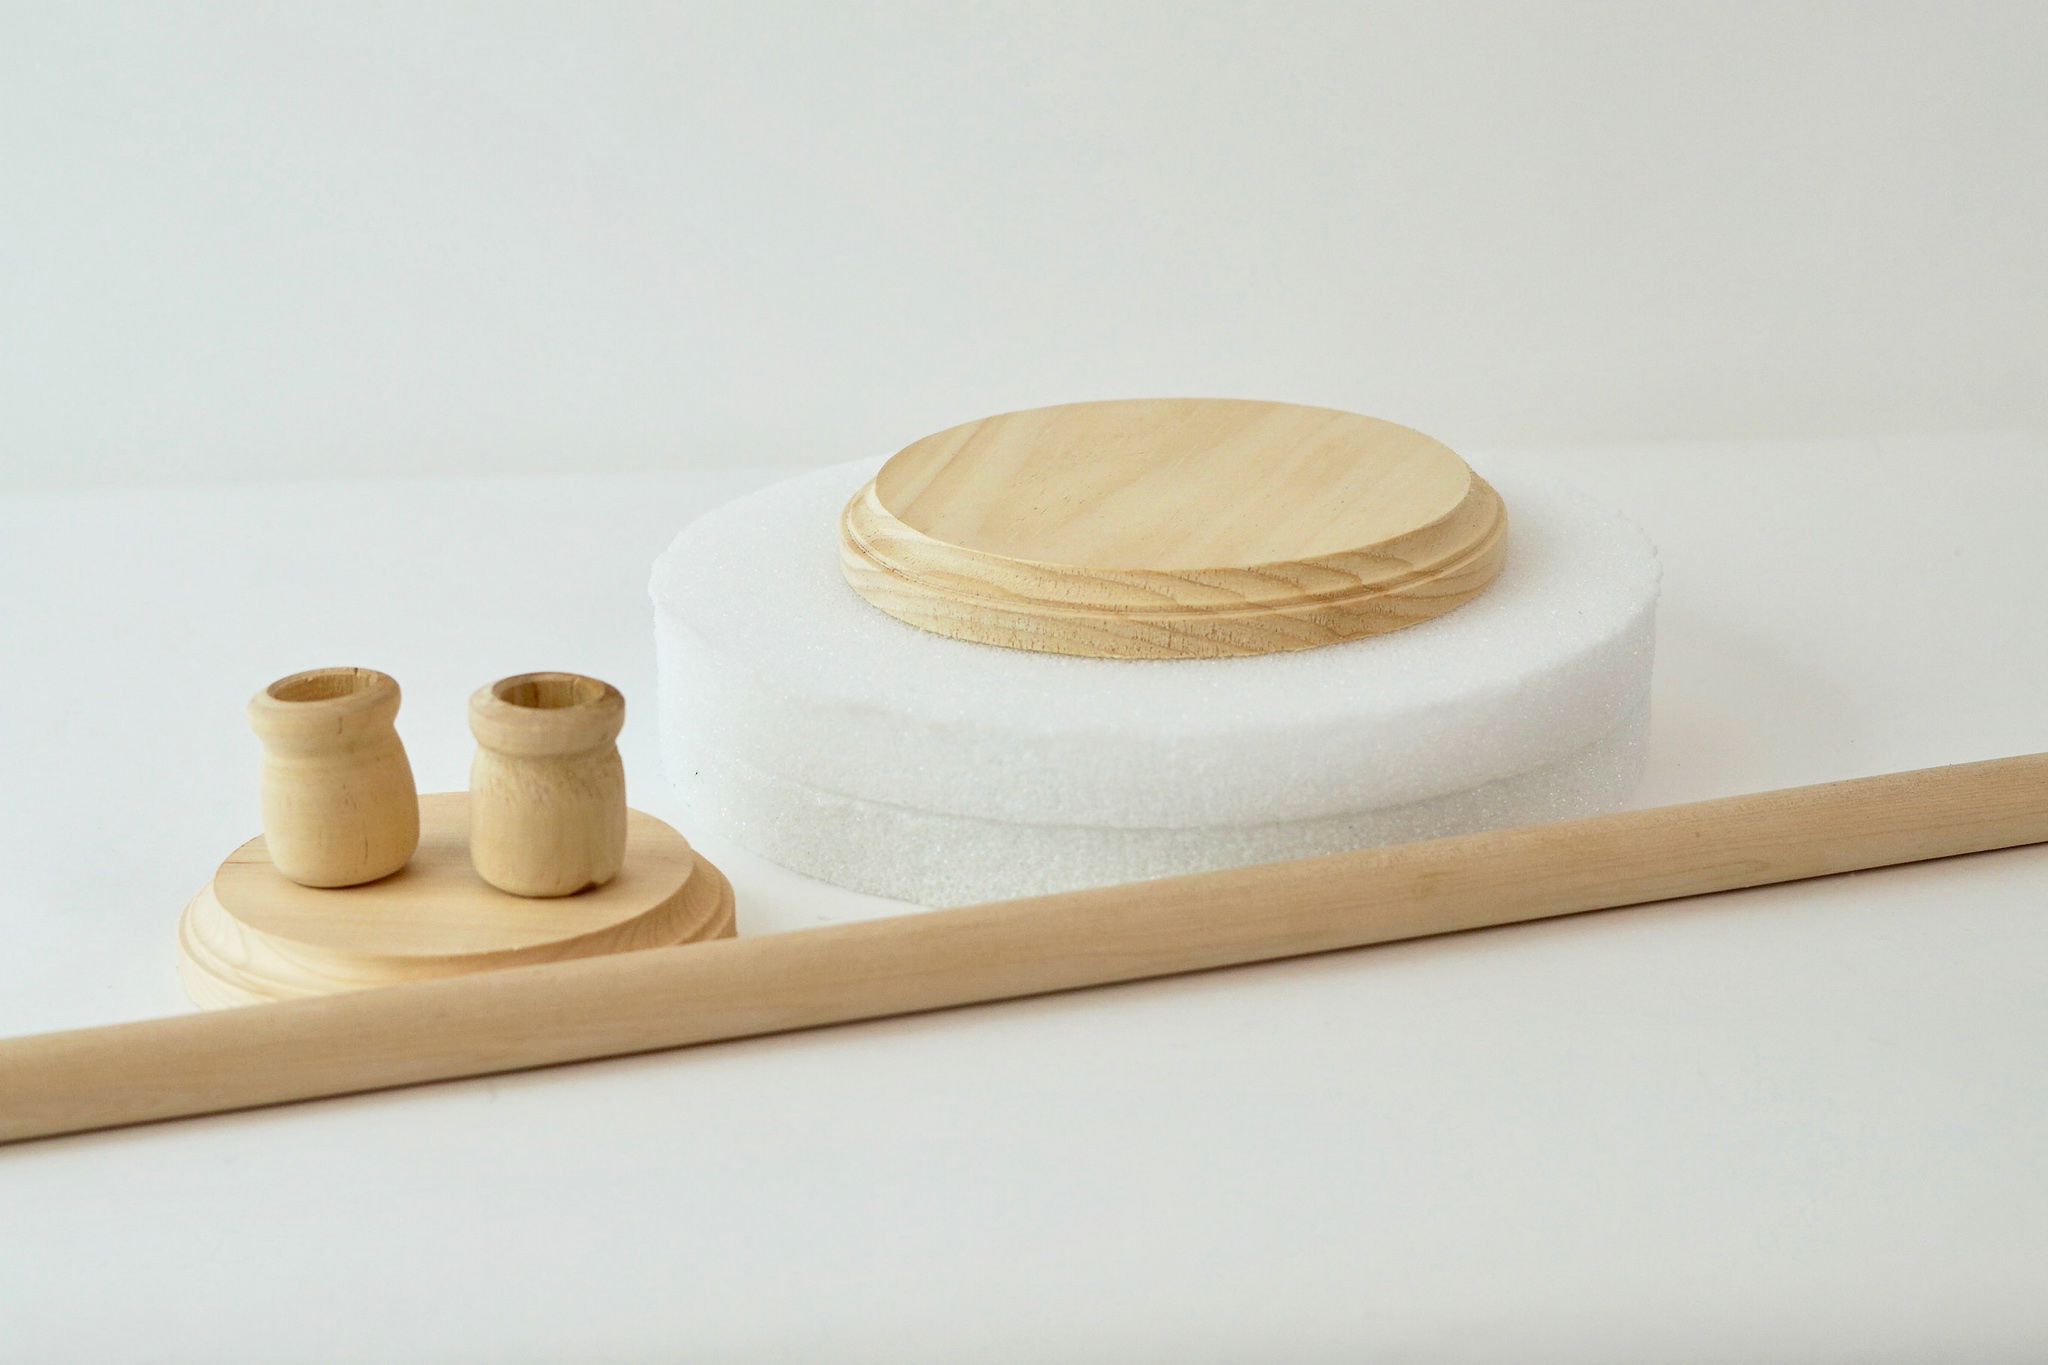

Make the Base
STEP 2: It is now time to create the base for the centerpiece. Take one of the extra large birch cups and place it in the center of one of the 10 inch foam disc. Repeat this step to the other foam disc. Next trace around the birch cup and then cut out the circle with a foam cutter. Attach the round wood plaque to the 10 inch foam disc with wood stik glue. Then attach the extra large birch cup with the wood stik glue in the foam disc center cut out. Lastly, attach the 7/8″ wooden dowel in the center of the birch cup using the wood stik glue to adhere it. Allow it to dry for 15 to 20 minutes. [See Video]
Create the Topper
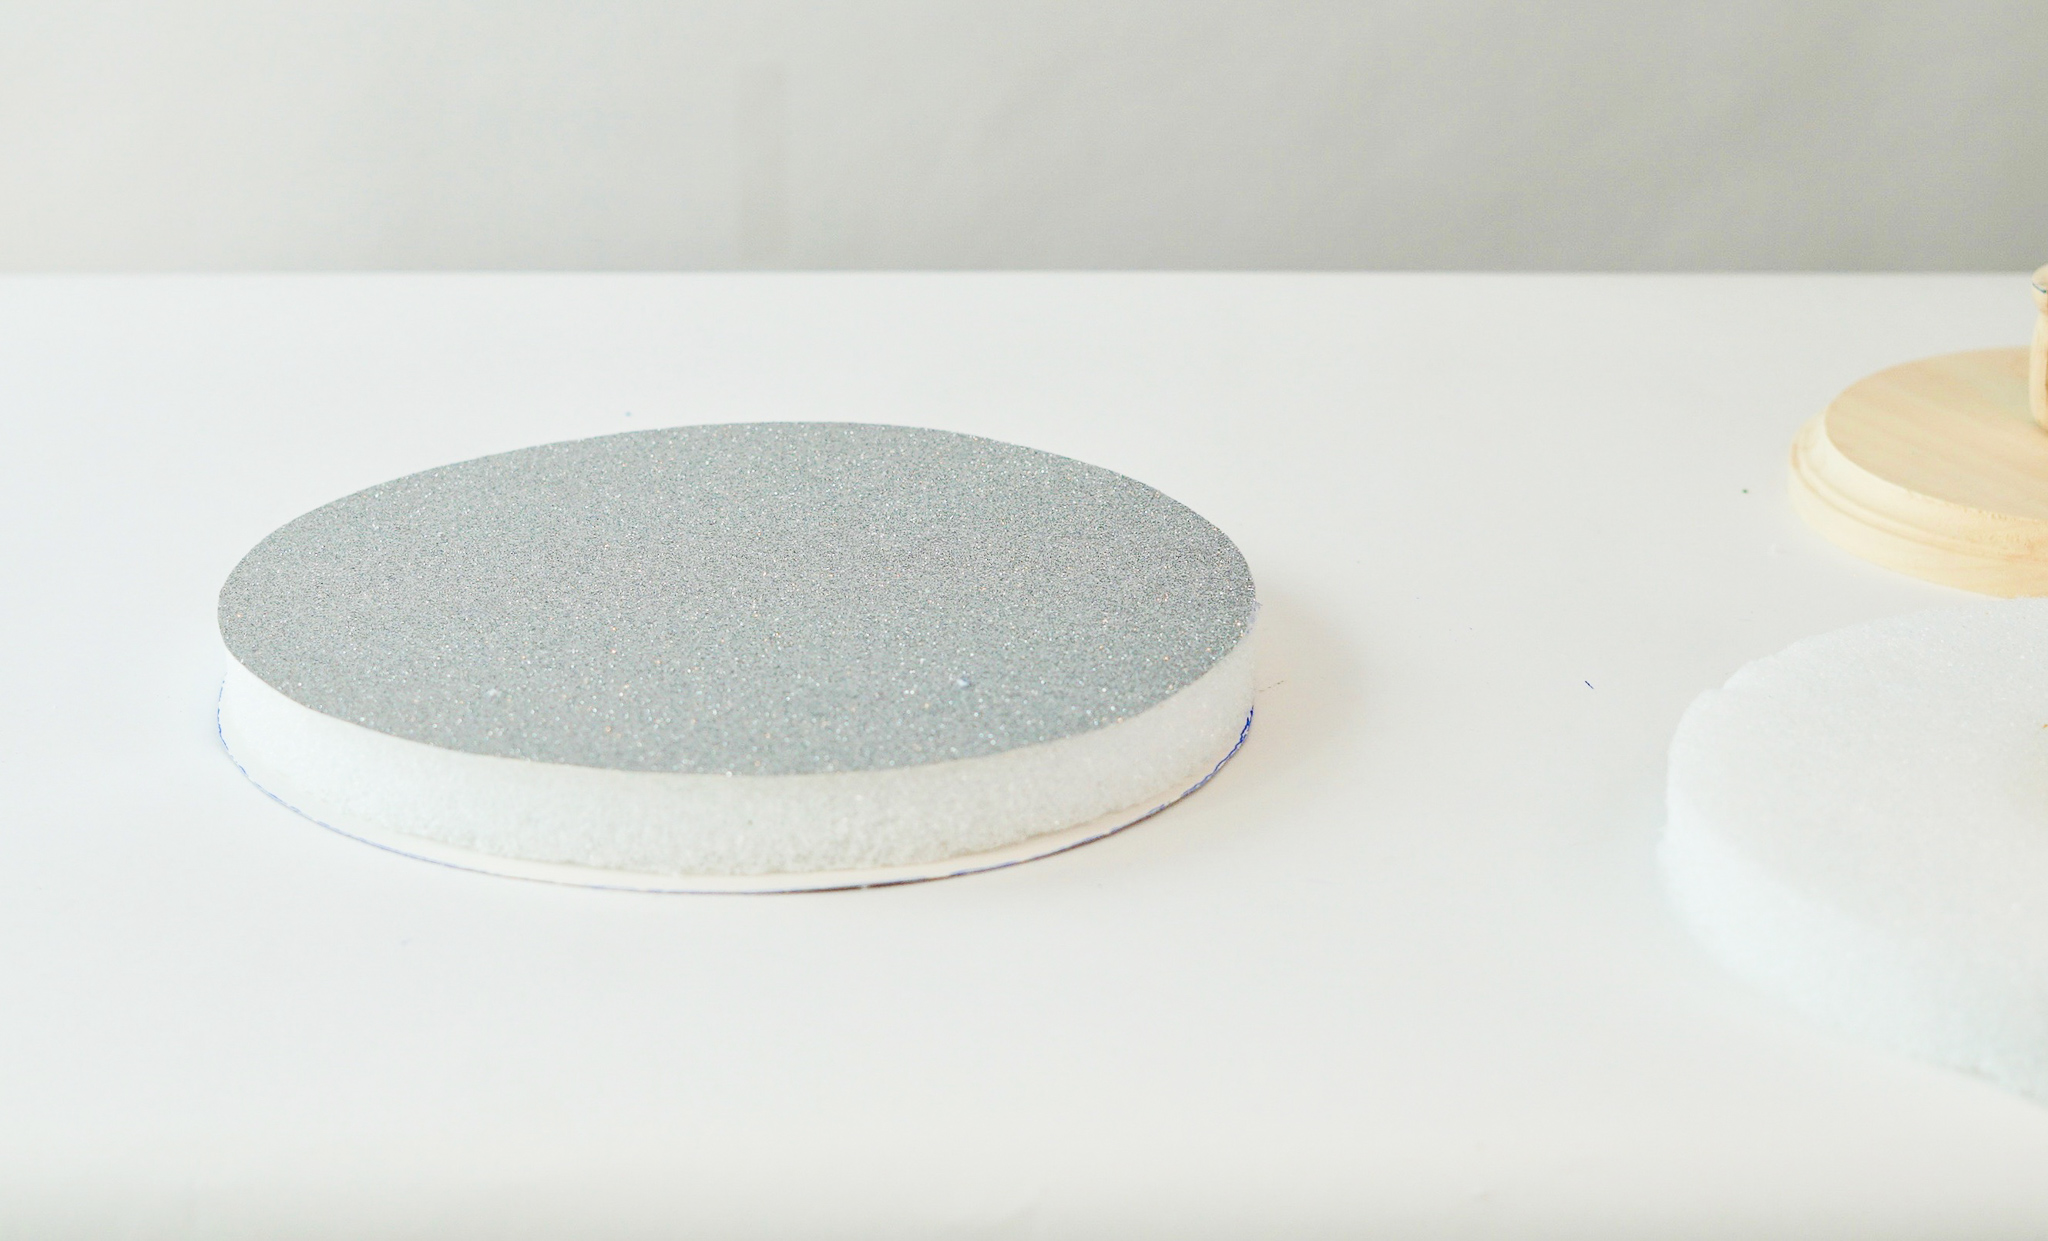
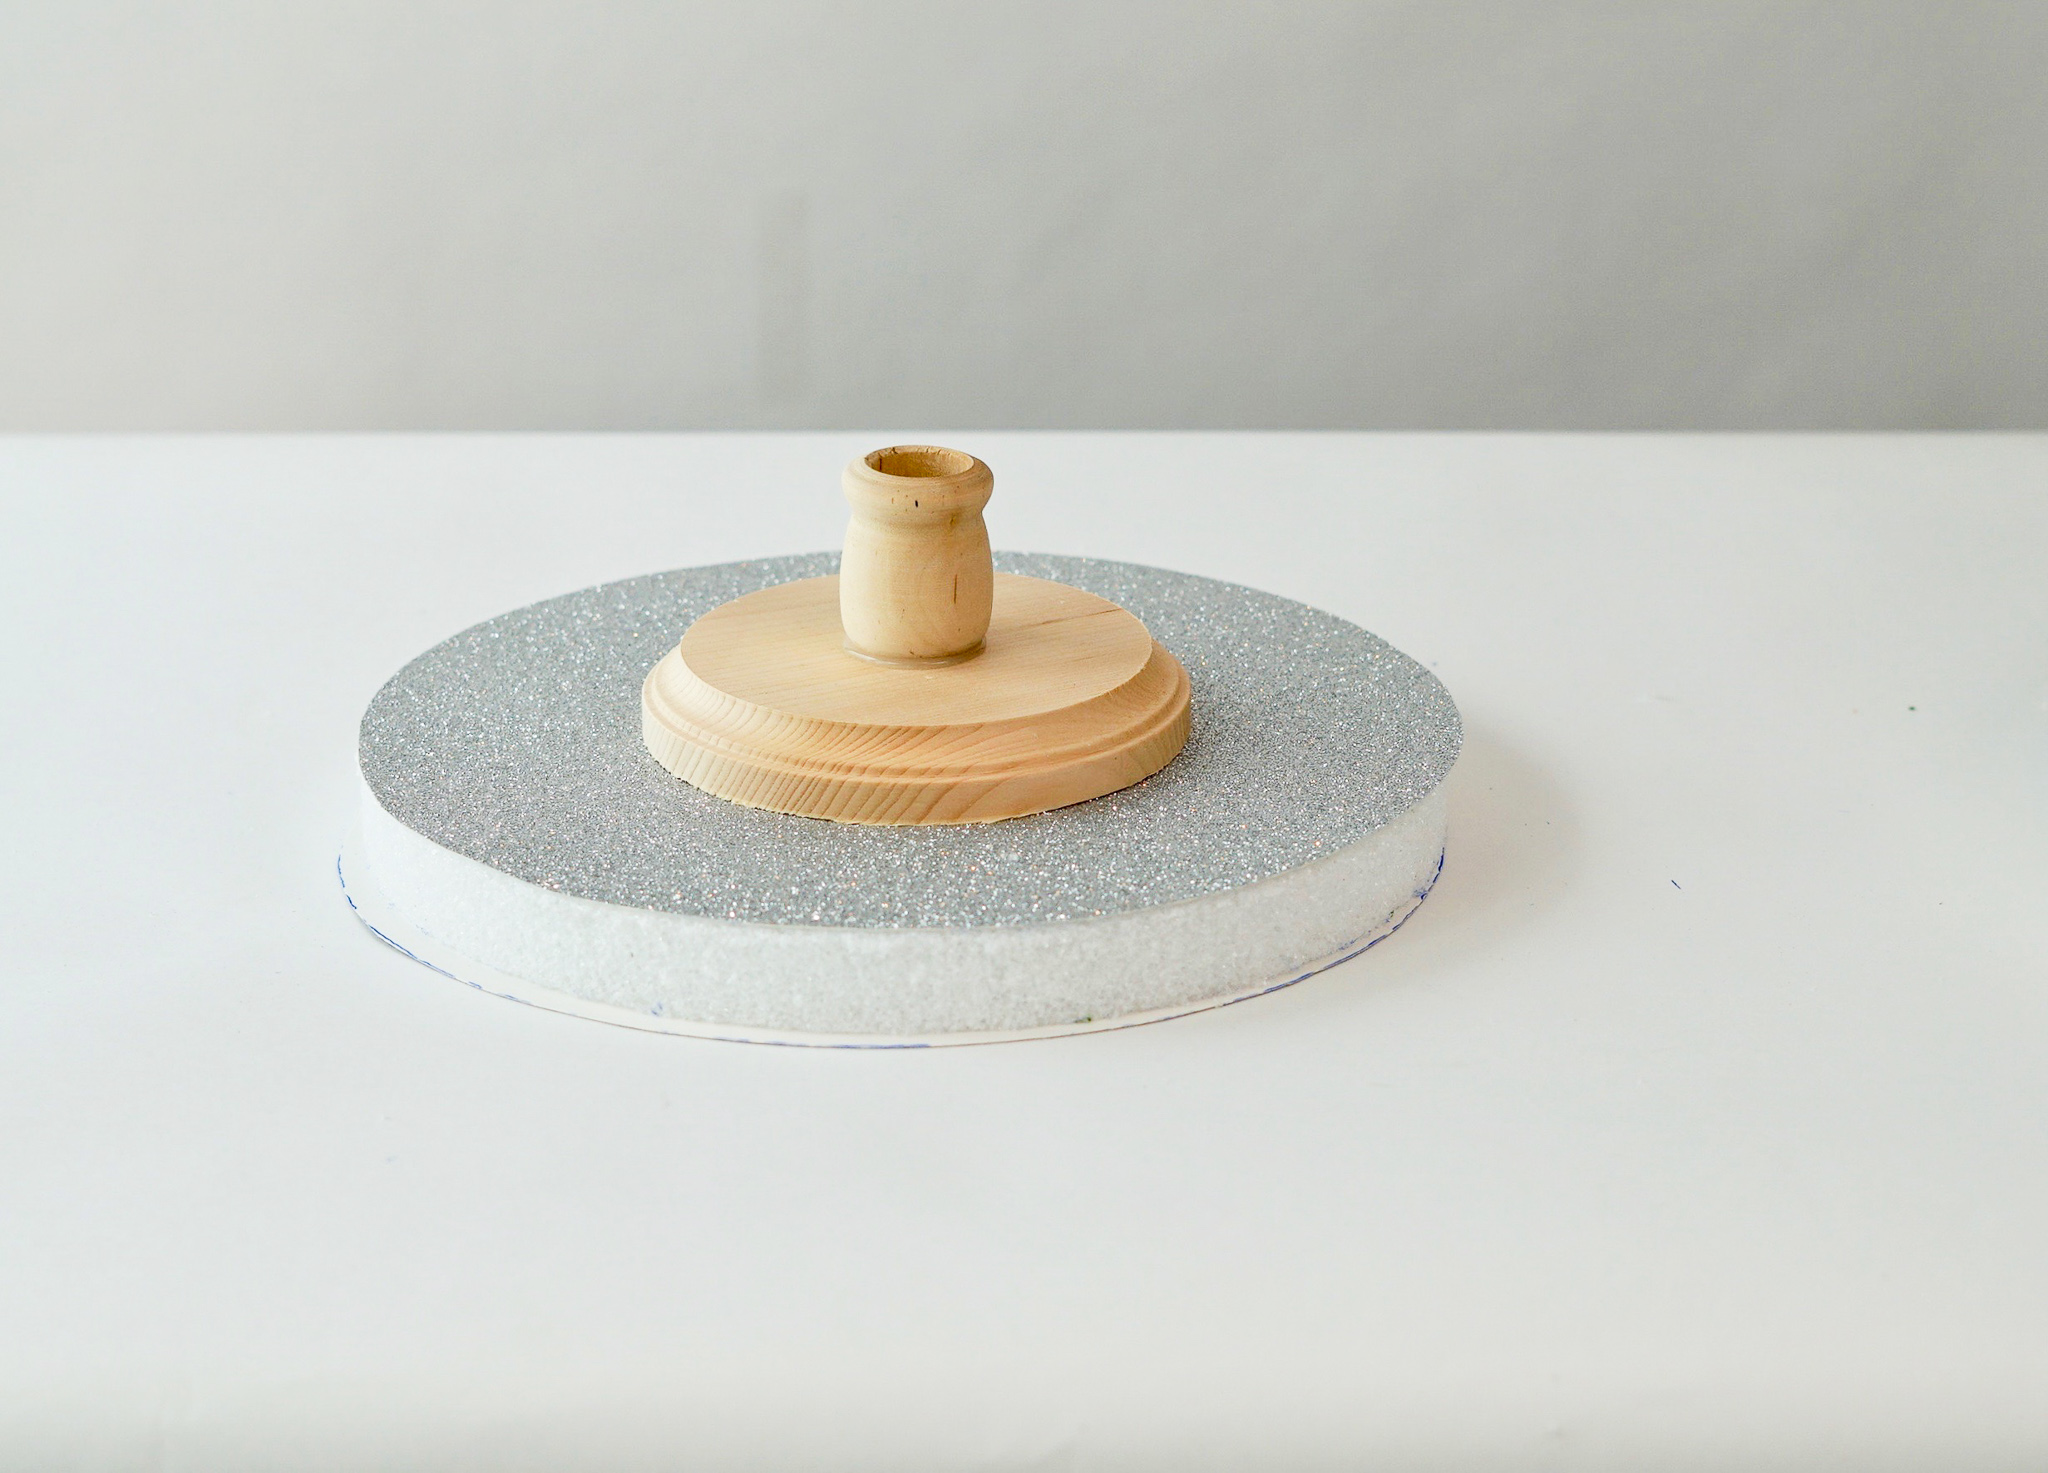
STEP 3: Place the other 10 inch disc on the silver glitter scrapbook paper. Cut out the traced pattern. Now repeat this step to an additional piece of scrapbook paper. Hot glue the silver glitter scrapbook paper, one on each side of the 10 inch foam disc. Then hot glue the wooden plaque on top and hot glue the extra large birch cup on top of that. Paint both the wooden plaque and the large birch cup with silver paint. Once the paint has dried, apply hot glue to the top of the wooden dowel and attach the topper.
Make the Chandelier Effect
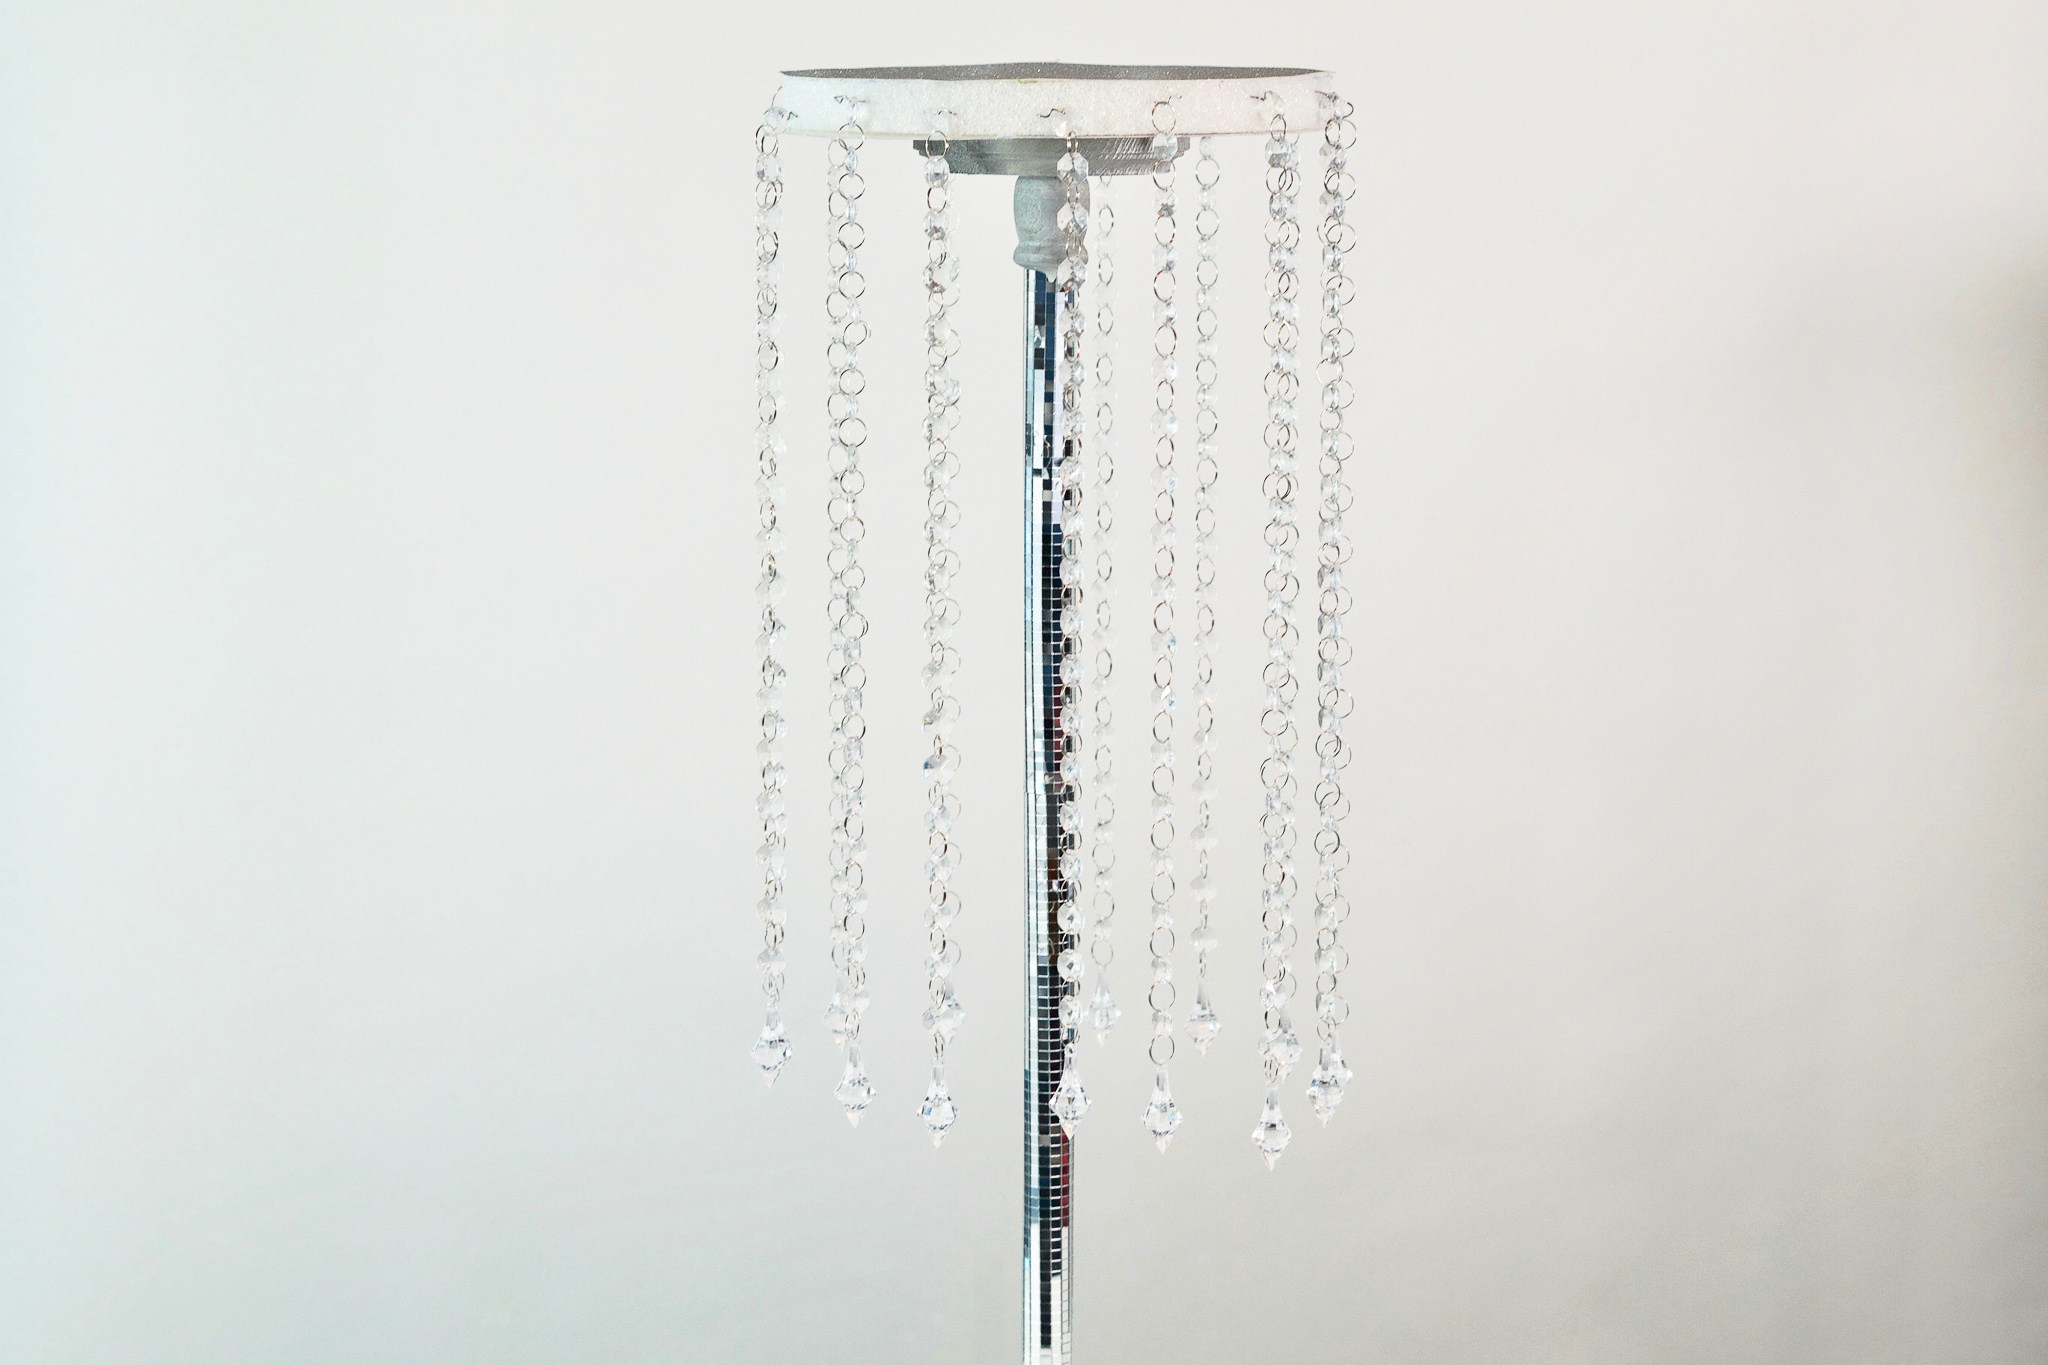
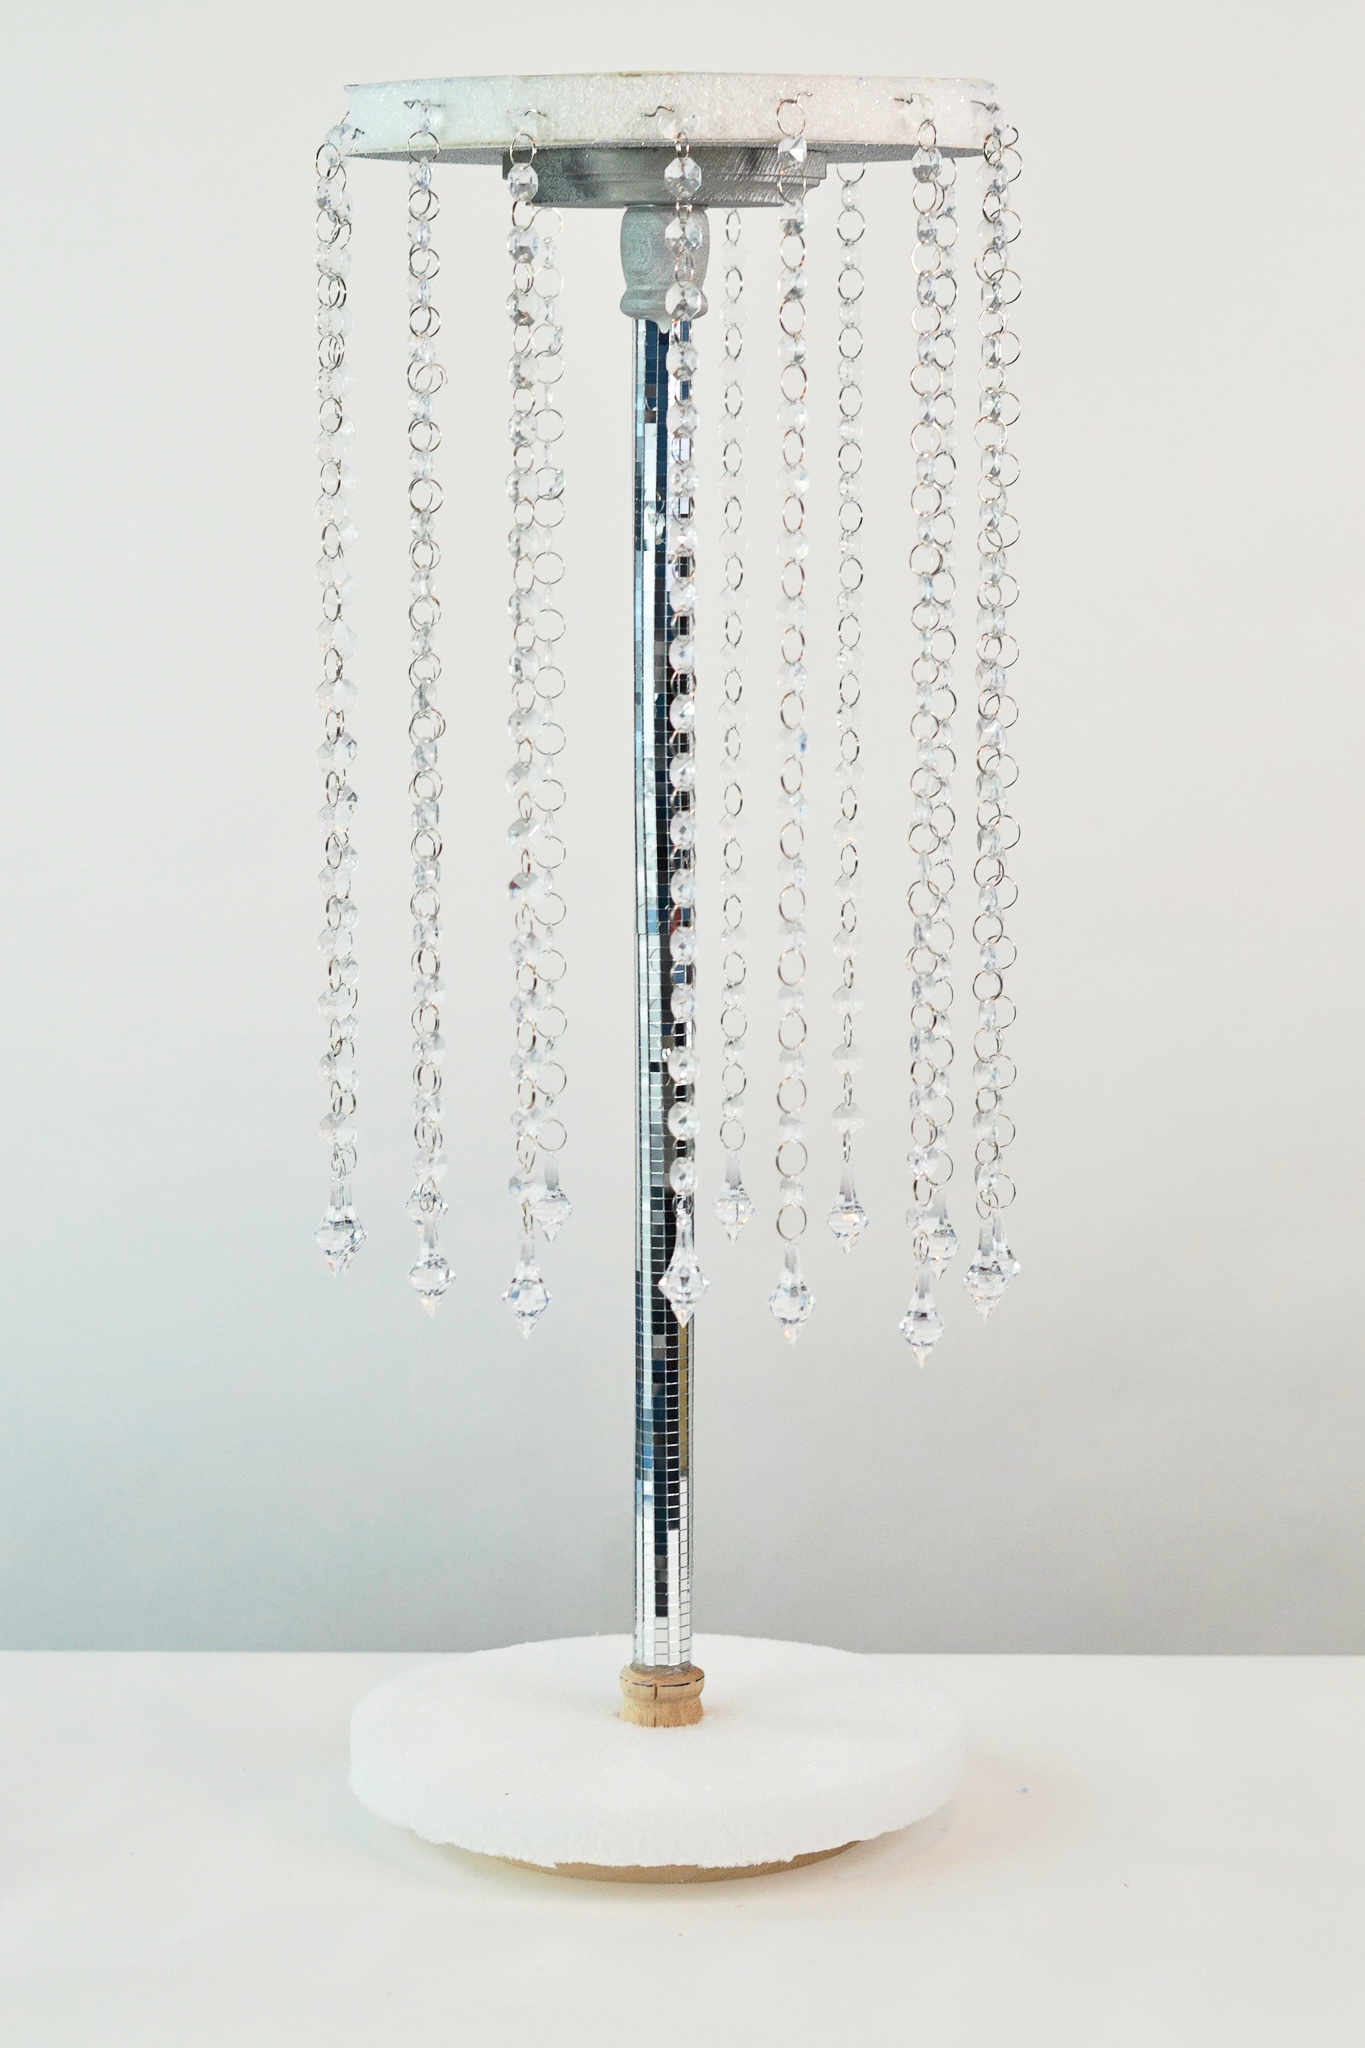
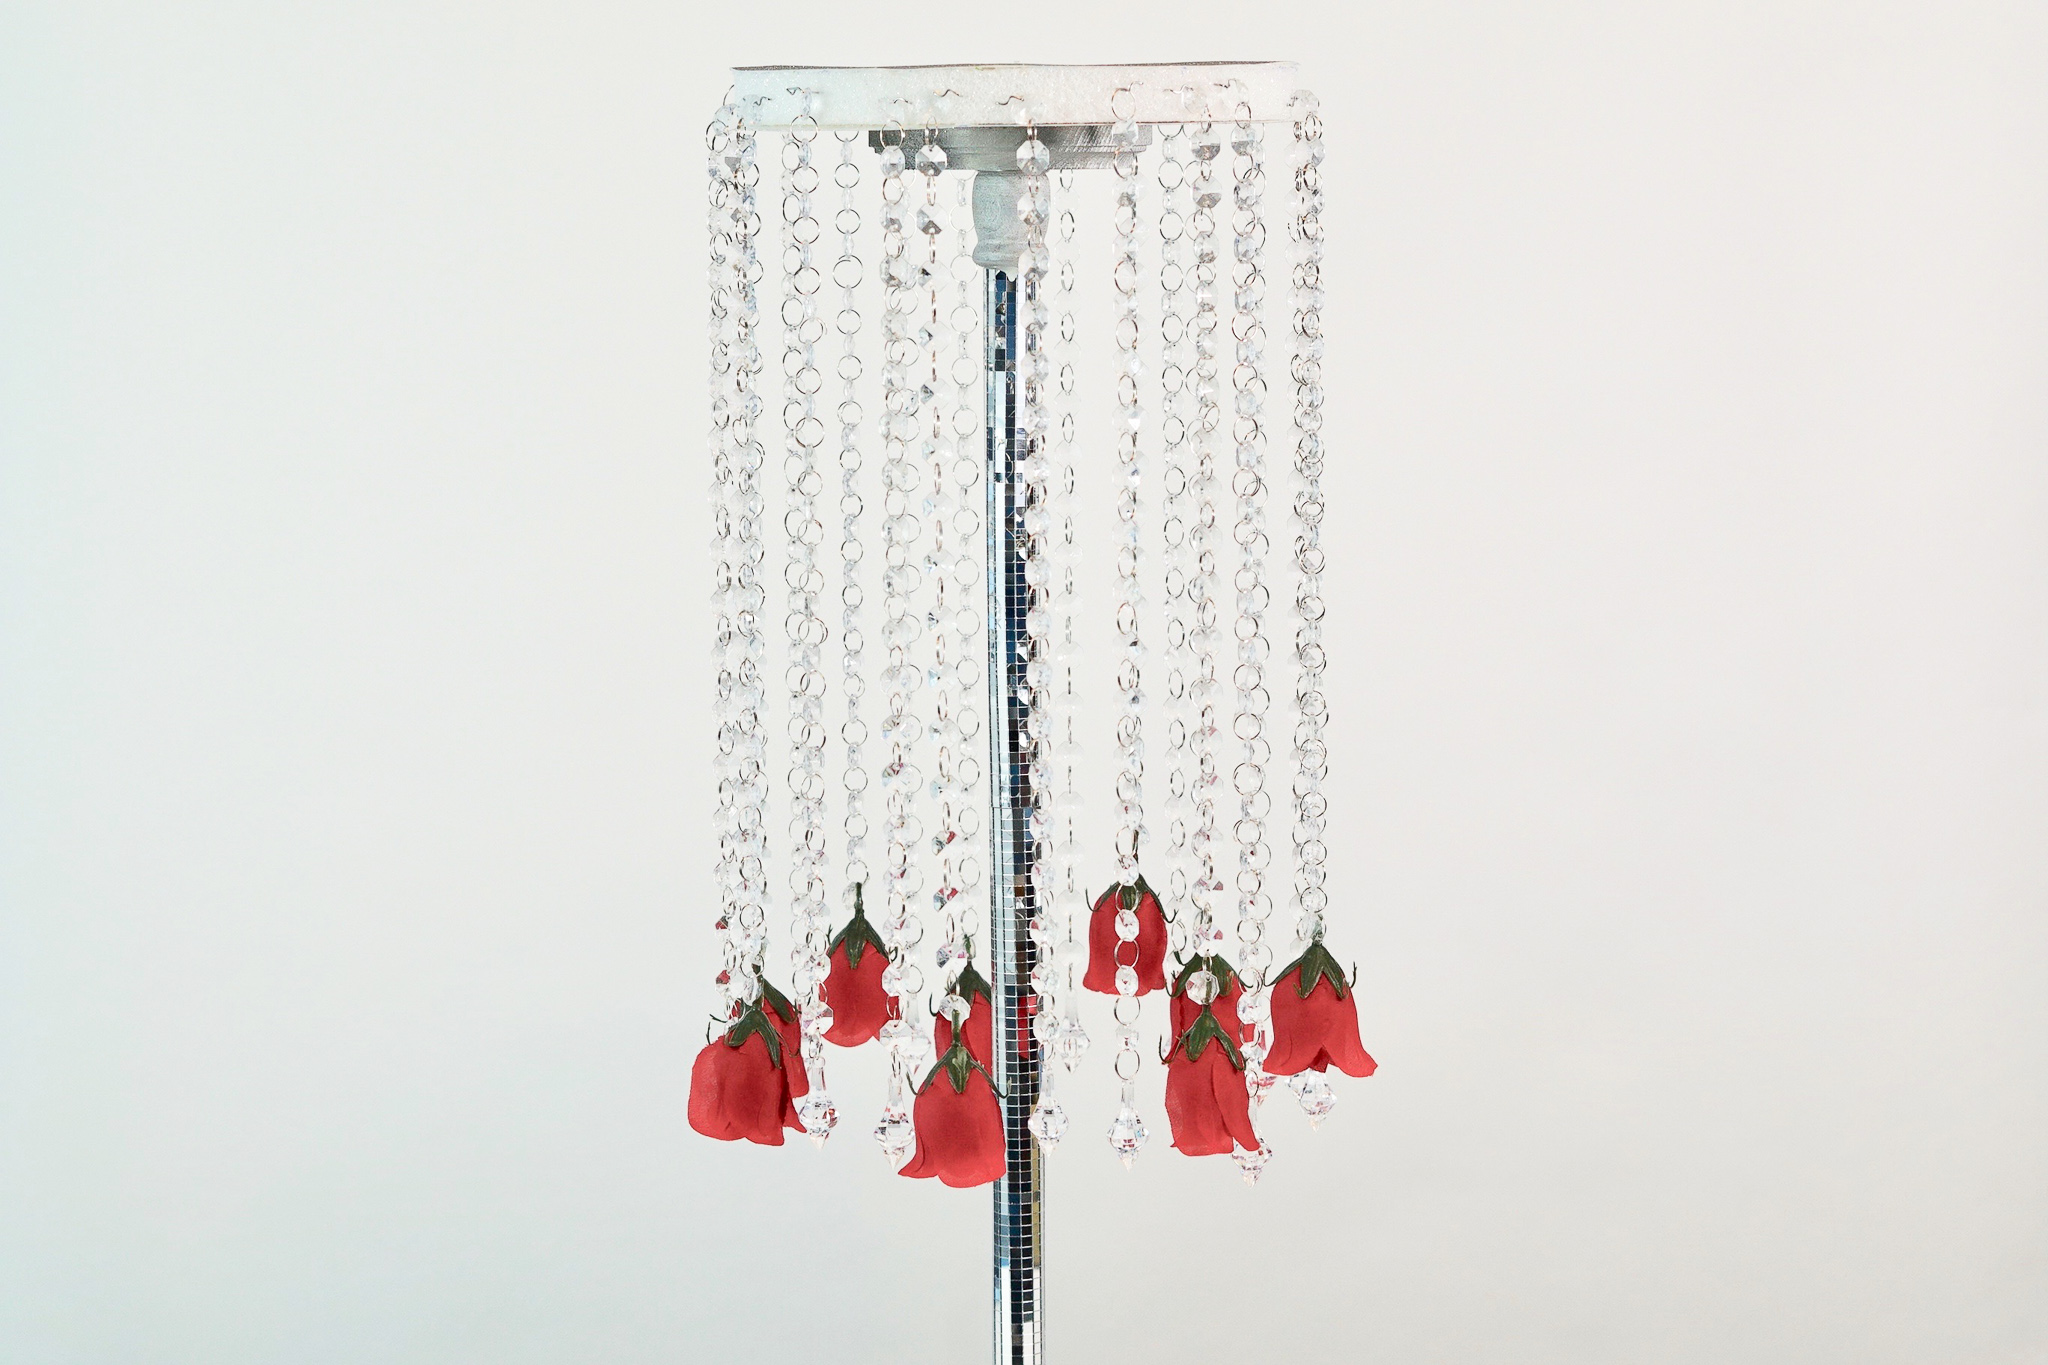
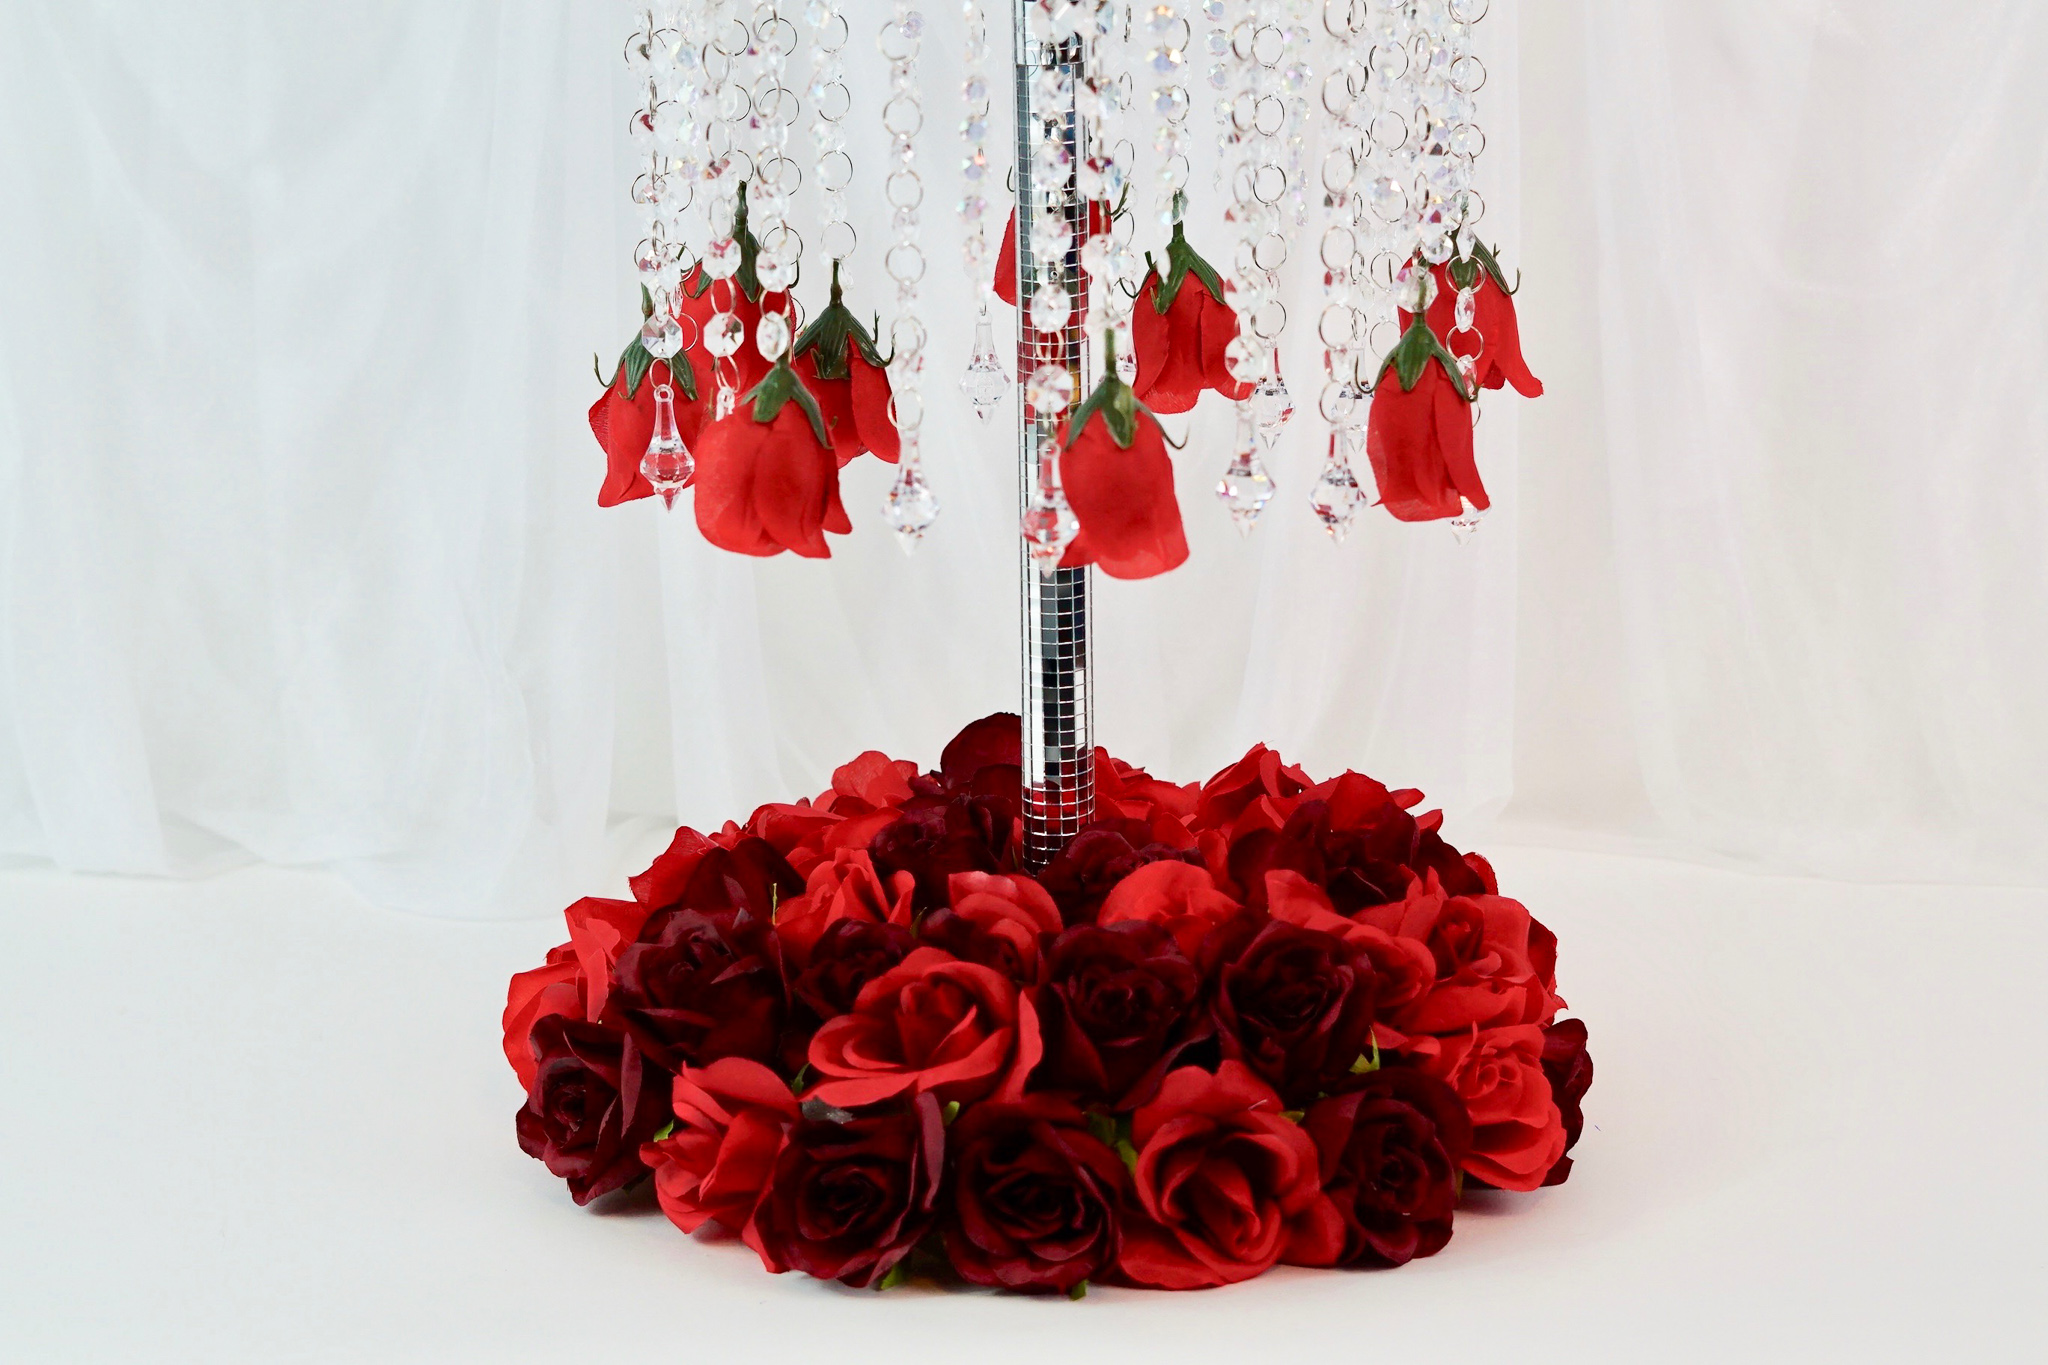
STEP 4: To create the chandelier effect, you will need to use 3 different attachments. The first attachments are twenty to thirty 15 inch clear diamond garland strands. The second attachments are 16 inch crystal clear acrylic bead garland chandelier strands. For this strand, you will add the third attachment which are chandelier drops to the end of each strand. Making your strands now 18 to 19 inches long. Take another one of the garland chandelier strands and attach a rose to the end with hot glue. You now will have three different looks for your chandelier effect.
THE FINAL STEPS!
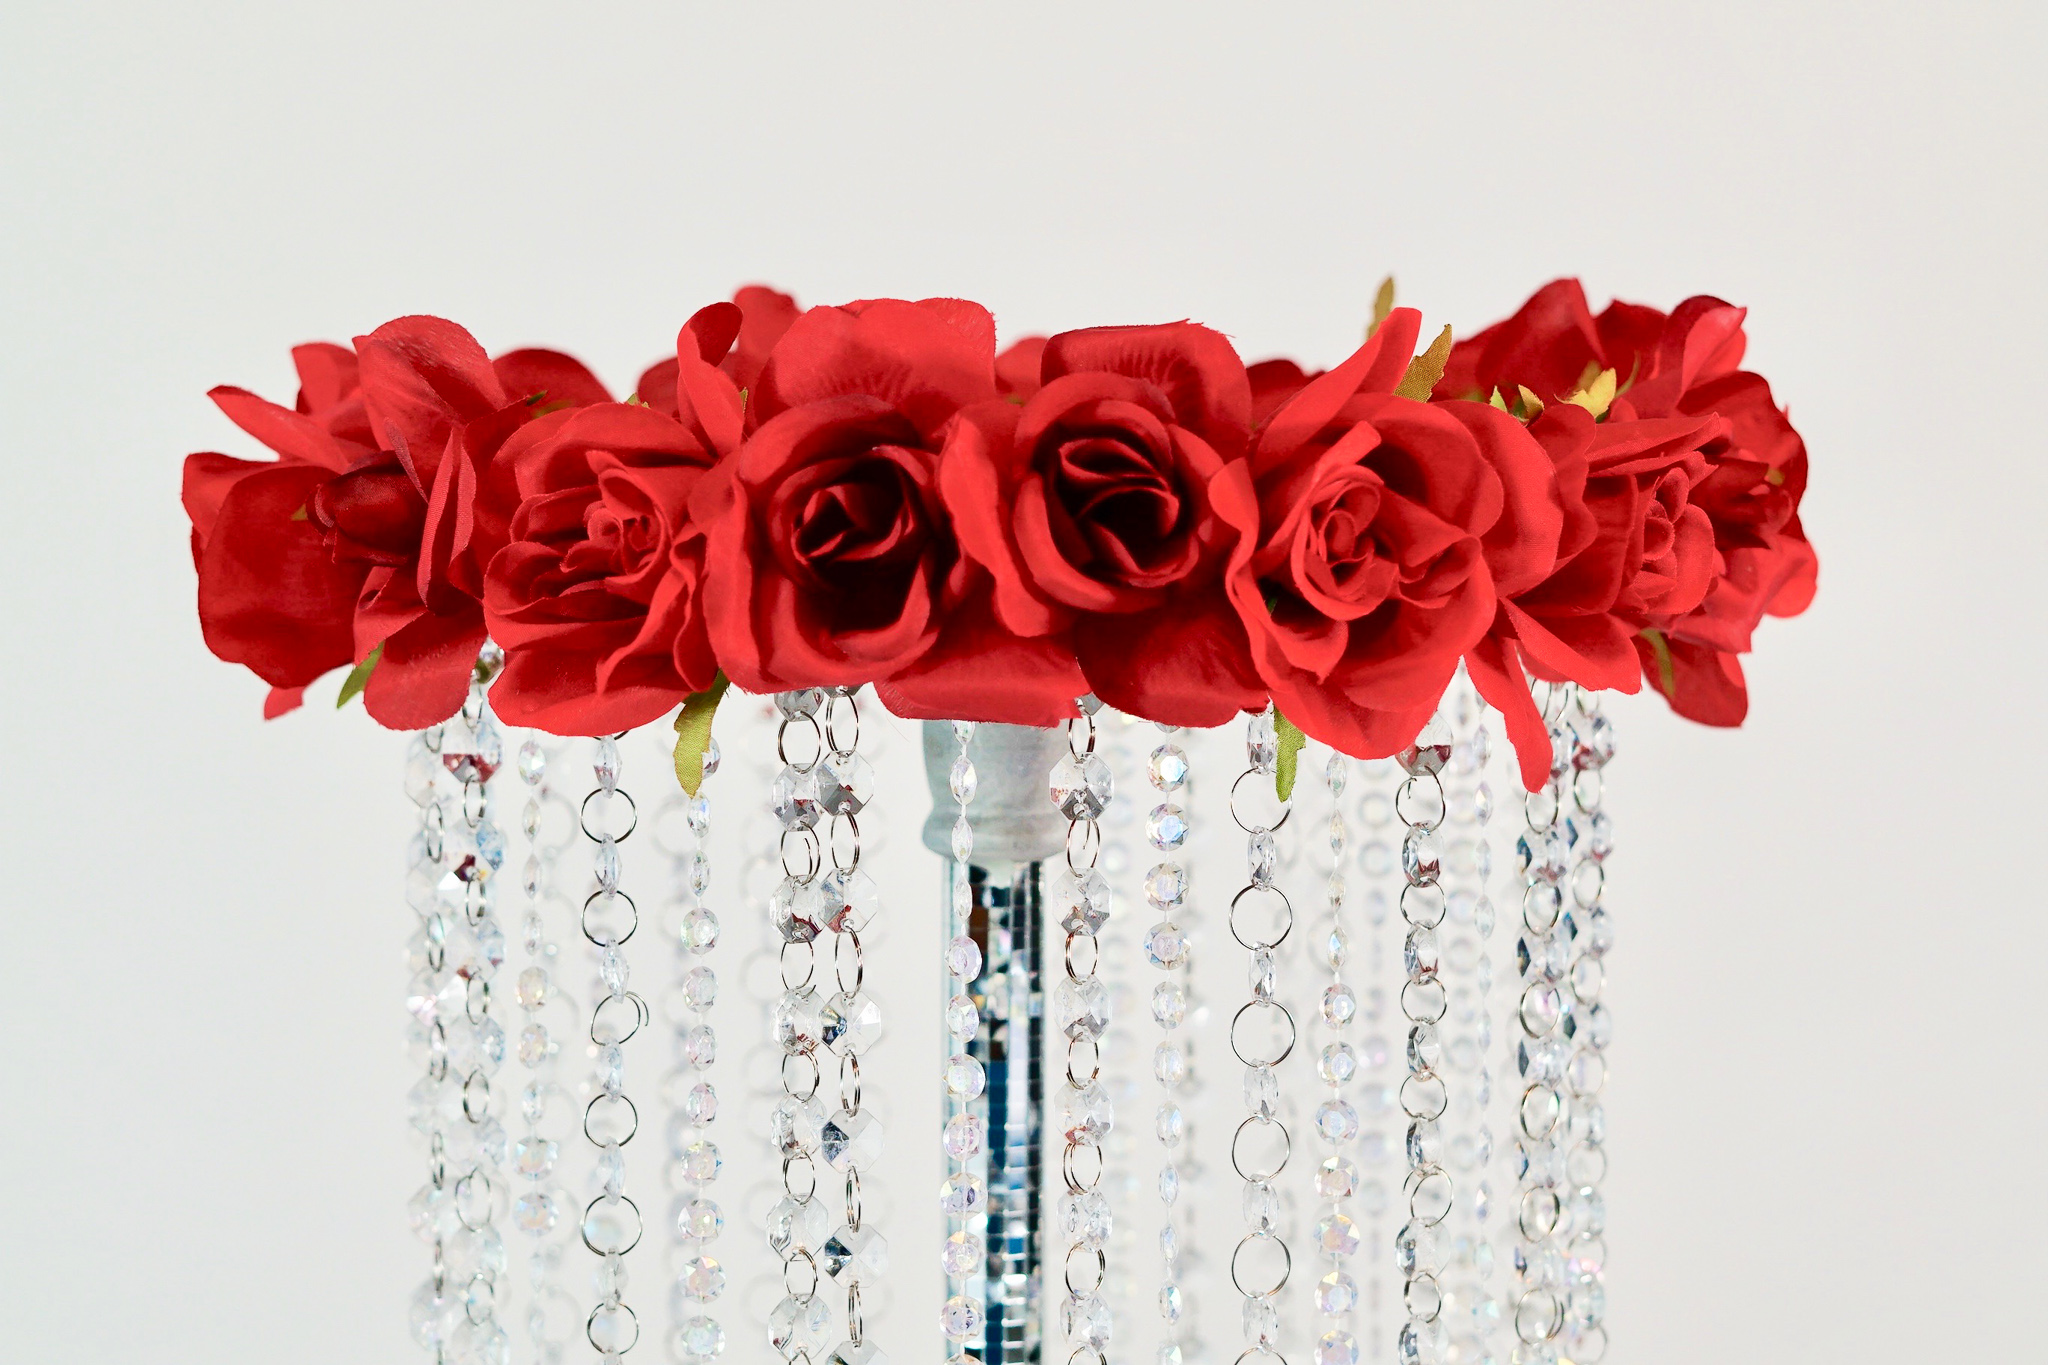
STEP 5: Attach 10-12 garland chandelier strands 2 inches apart and 8-10 rose garland strands in between the garland chandelier strands to the top 10 inch disc with floral pins. Now attach diamond garland to each side of the rose garland with floral pins. Add 16-20 rose blossoms. To the base 10 inch foam disc of the centerpiece, attach 20 red and 20 burgundy rose blossoms.
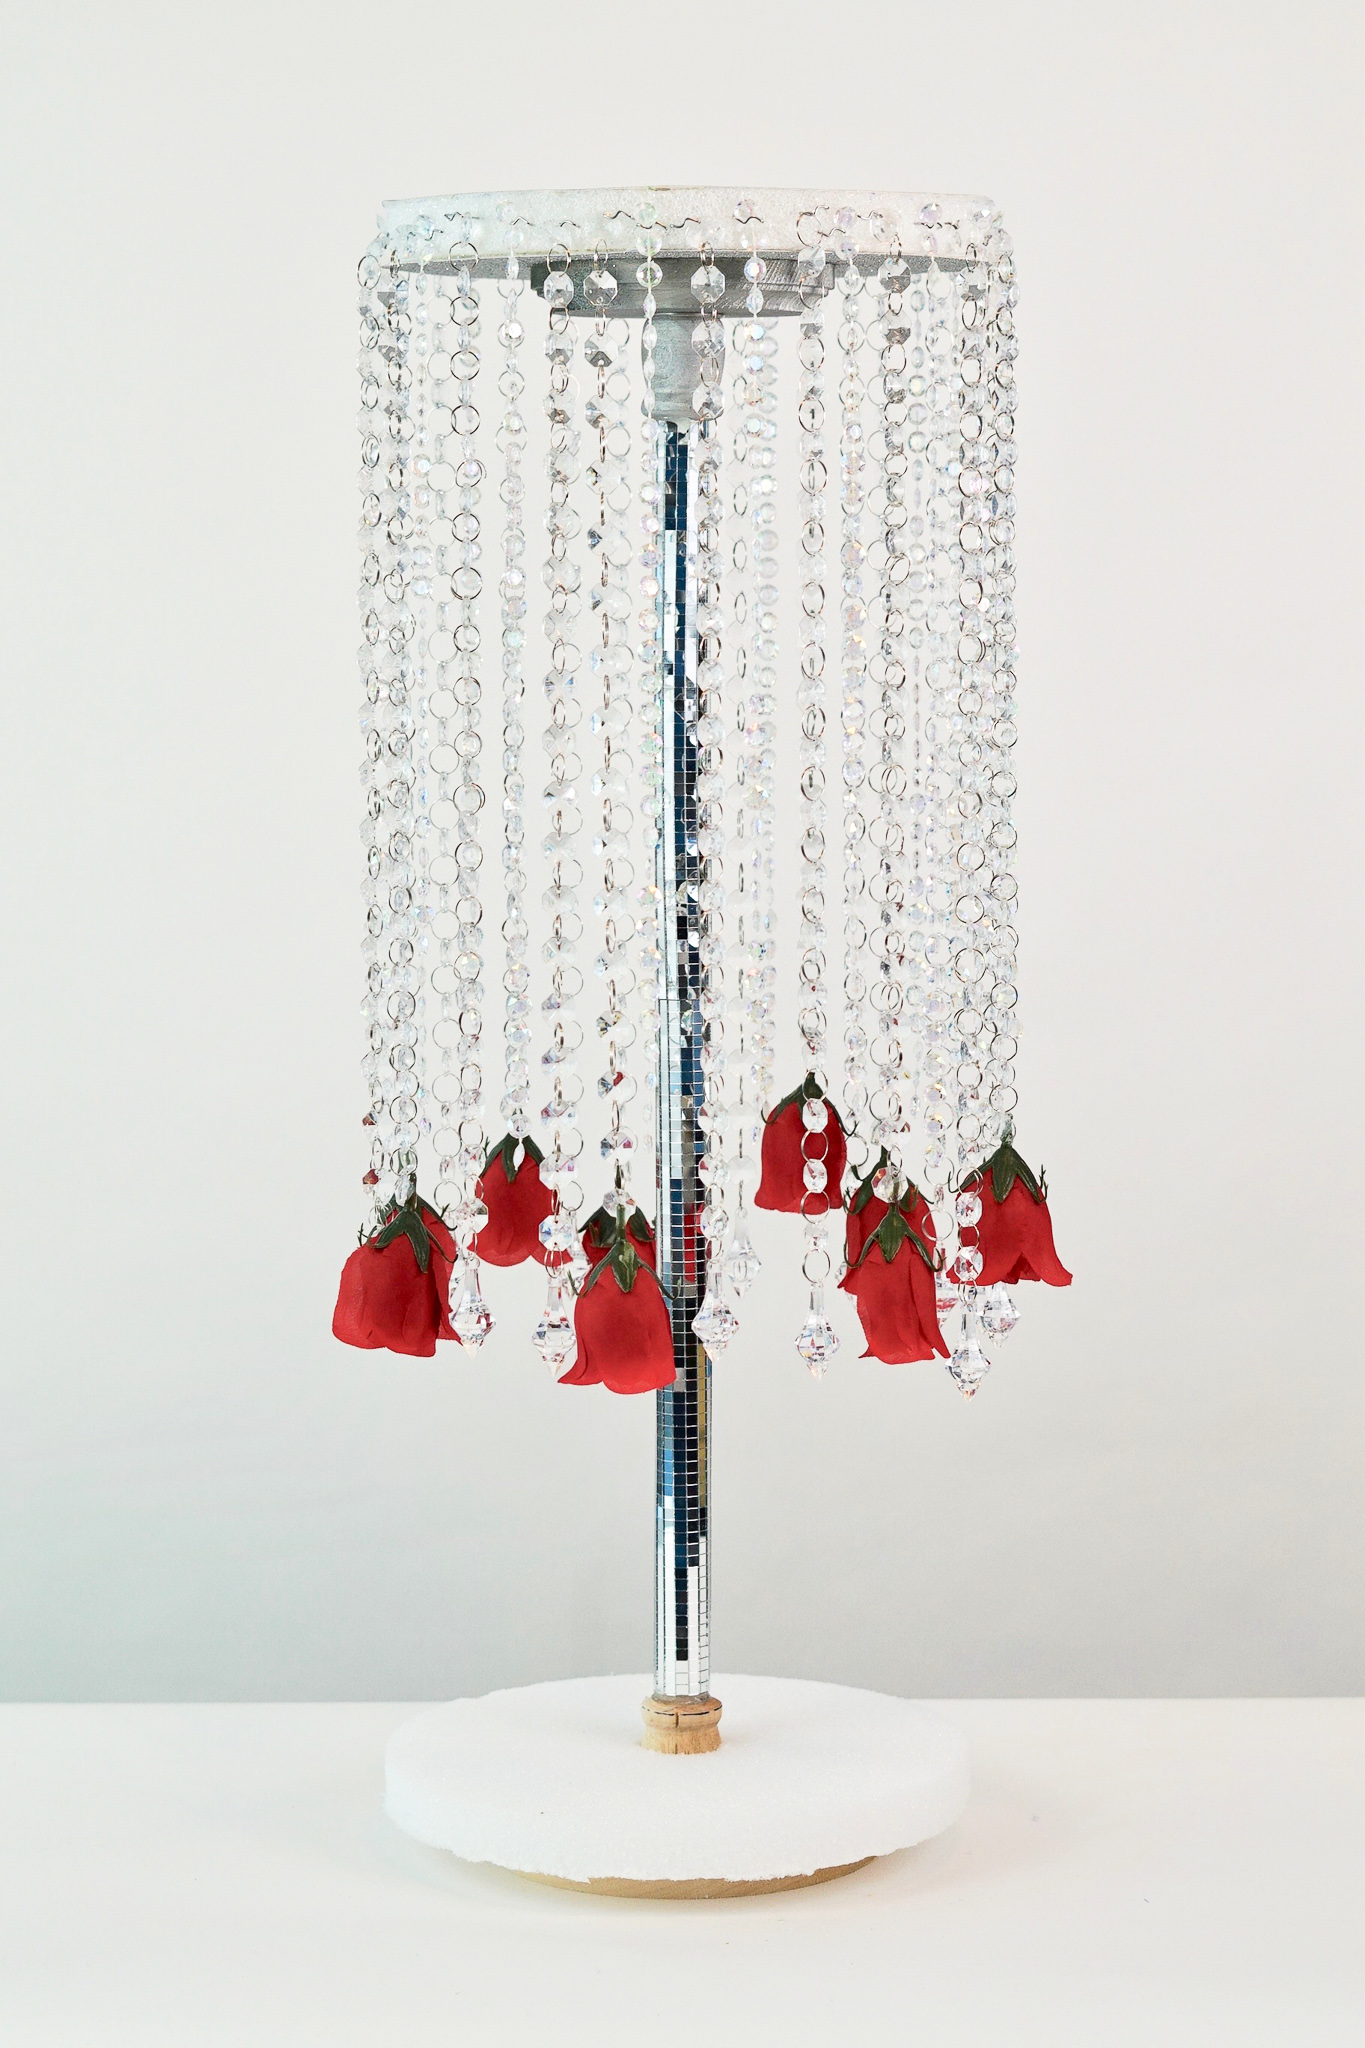
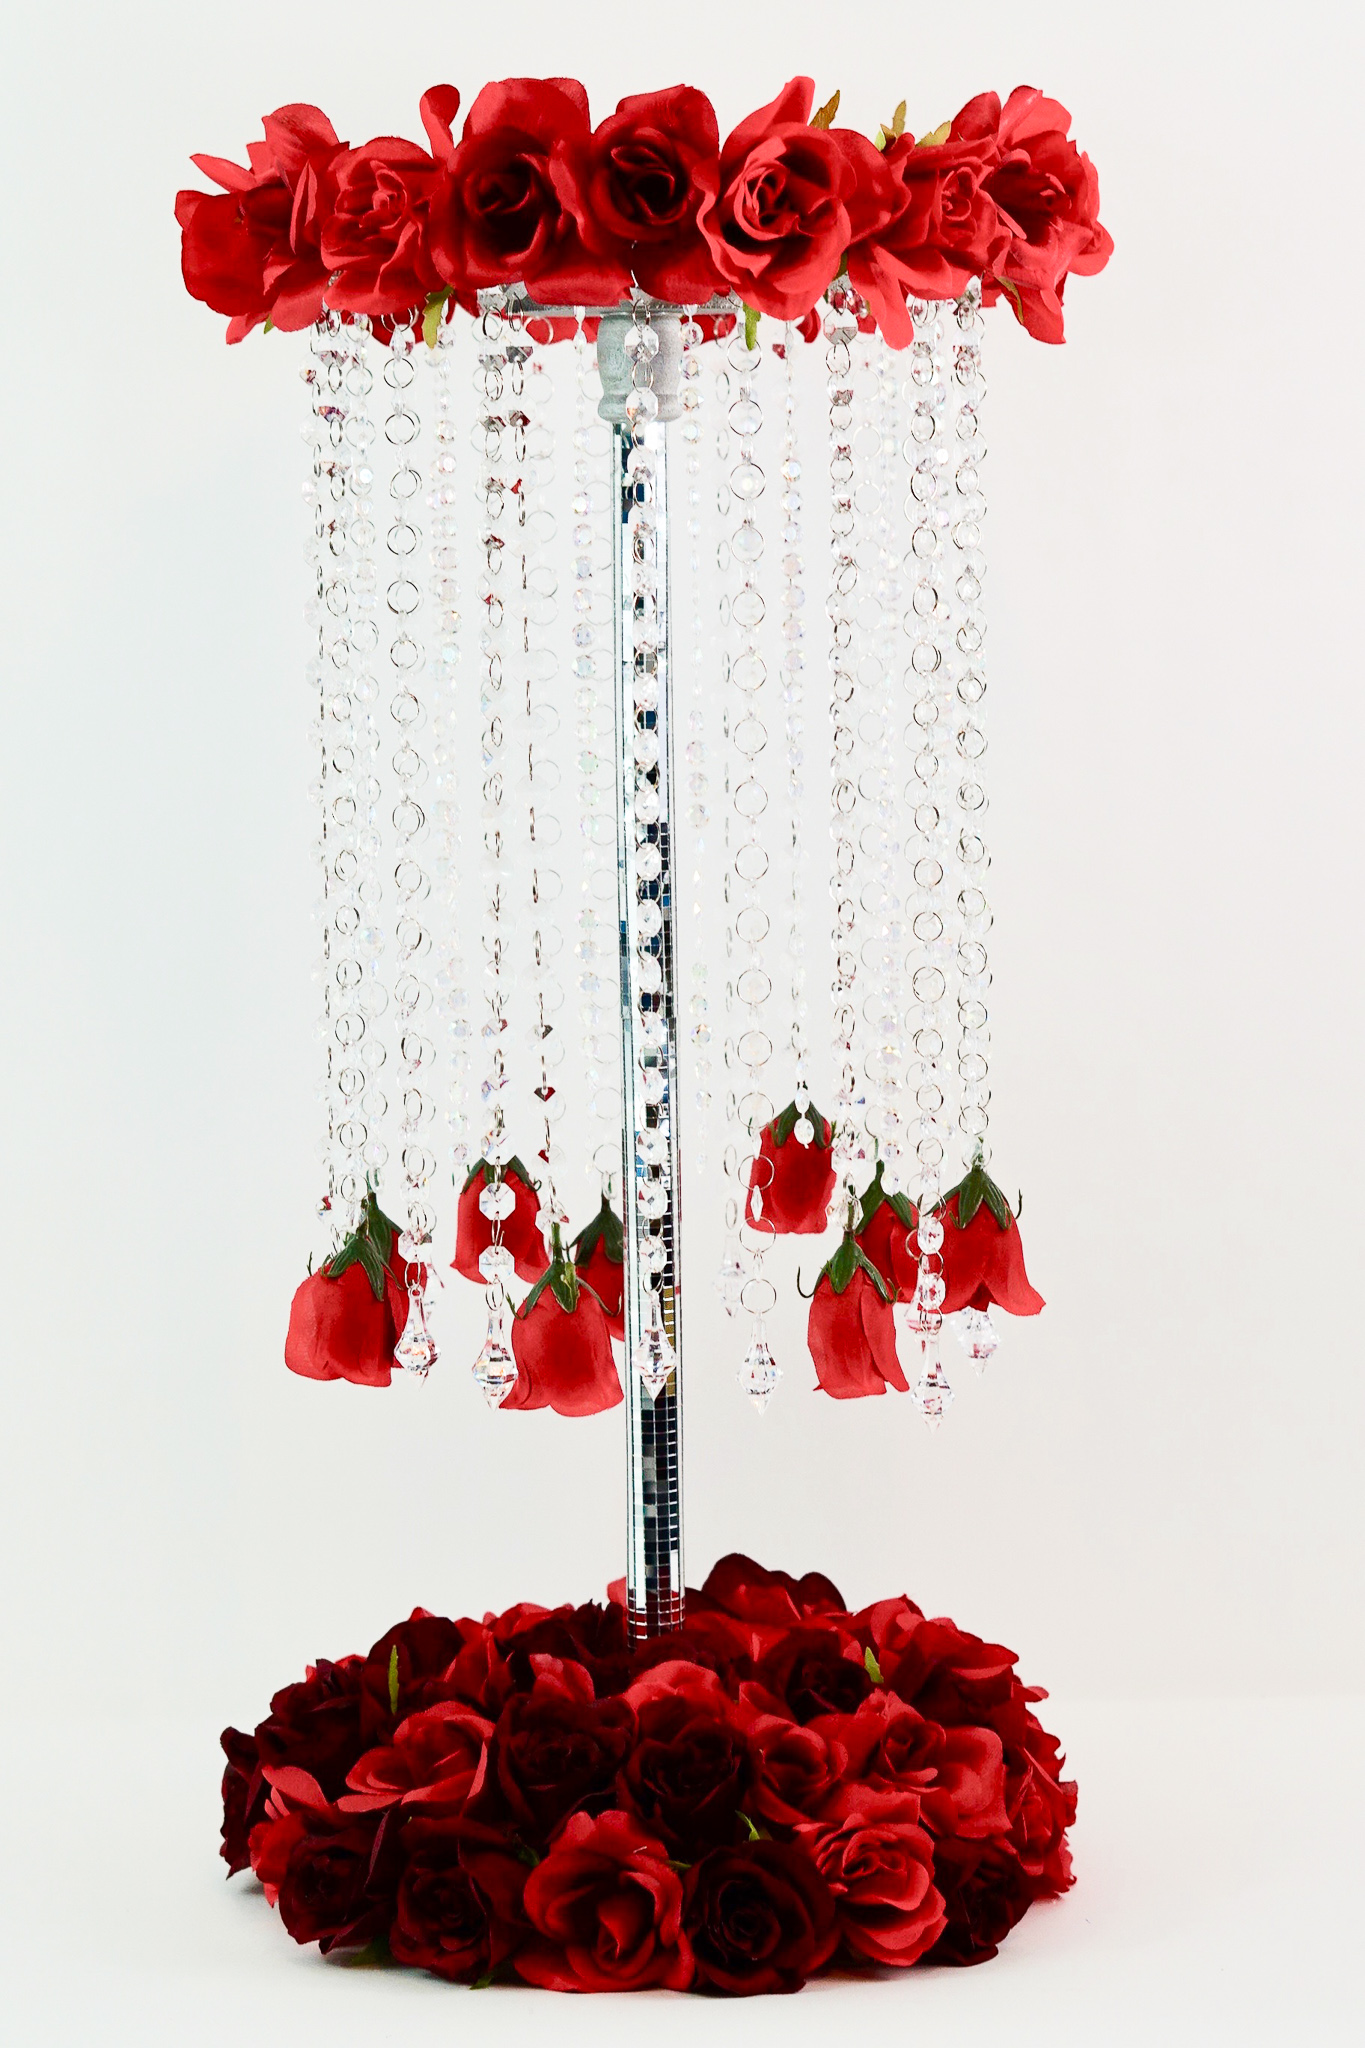
I absolutely love how this DIY Tall Chandelier Rose Wedding Centerpiece turned out! The outcome is amazing and definitely gives you an extra special touch to your wedding!

If you like the outcome please subscribe to our Youtube Channel for more DIY Videos and follow us on Facebook and Pinterest.
Need help with an upcoming project? Be sure to send us a project request!
“Remember When Every Penny Counts, Count on MissPlanIt”