THIS POST MAY CONTAIN AFFILIATE LINKS. PLEASE READ MY DISCLOSURE FOR MORE INFO.
Create Your Own Candle Chandelier!
I’m always ready for a little glow and romantic ambiance! So when a Community Member asked if I had a simple yet stunning idea to elevate her space for a special evening without complicated steps or a big budget. I didn’t hesitate for a second. Creating décor that feels warm, elegant, and effortlessly beautiful is what I strive for. If you’re dreaming of a statement piece that instantly sets the mood and fills your space with soft, flickering light, you’re going to fall in love with this one. Say hello to the DIY Romantic Candle Chandelier! It’s the perfect mix of drama, charm, and simplicity. Ready to create a little magic? Let’s get started!
BUT WAIT!
Before we get started I want to share an awesome tip on how you can earn cash back with your online purchases for all the items you will need to complete this project!
As our saying goes “When Every Penny Counts, Count on Miss PlanIt.” We love to save money and get great deals. Prior to us purchasing anything online, we check out Rakuten, find the store, click the current deal for that store and complete our purchase.
If you have never used Rakuten, you are MISSING OUT. So for this project, you would go to Rakuten.com, sign up, and then type in the store you plan to purchase from.
When completing a purchase through Rakuten you earn cash back that you can have mailed to you or sent via PayPal. Be sure to check it out! Click here to sign up for Rakuten, and RIGHT NOW when you sign up, you will receive a $10 cash welcome bonus through my link when you spend $25.00!
You were already going to complete your purchase online, so why not get some cash back on things you already planned to purchase!
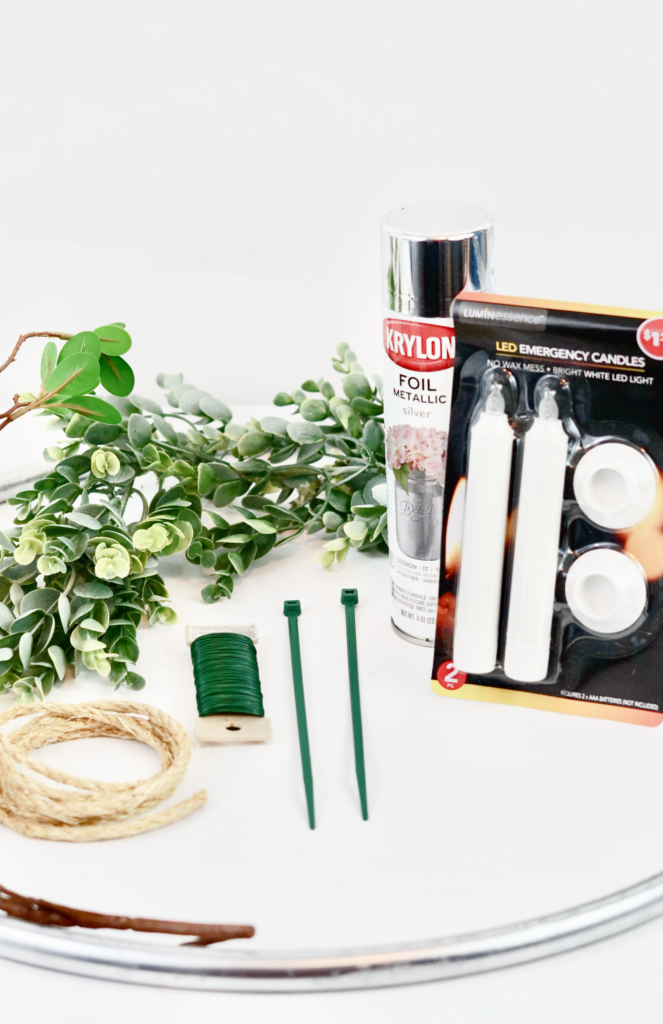
Let’s Get Started: Click the links below to purchase the supplies needed for this project:
- Flameless Tapered Candles
- 24inch Hula Hoop
- Krylon Metallic Silver Paint
- Green Zip Ties 8 inch
- Floral Wire
- Jute Rope
- Eucalyptus Garland
- Artificial Ficus Branches
- Wire Cutter for Crafting
Romantic Decor That Won’t Break the Bank!
STEP 1:
Before we get started, I want you got remember that we give you the plan and you make it your own! Spray paint your Hulu hoop any color you would like. I choose Metallic Silver. Just for a little sparkle and shine. Next we are gonna to attach the Jute Rope. I used 48 inches then doubled it and attached it to the hula hoop using a slip knot. To insure that the rope does not move out of place, add a little hot glue to the slip tie.
QUICK TIP!
Most of these supplies are available at your local Dollar Tree. So head on over if you have one in your area. Don’t worry if that’s not an option. We have giving you all of the Links to all of the supplies!
STEP 2:
Next you need to space out the 6 inch Flameless Tapered Candles around the hula hoop. I ended up settling on 8 candles. You can use more or less. It is completely up to you. Once you settle on the amount, attach the candle holder bases either with E6000 for permanent hold or hot glue for temporary hold.
Luxury Looks Made Simple!
STEP 3:
Attach 1 Eucalyptus Garland to the hula hoop using the 8 inch Green Zip Ties. Be sure not to zip tie to close to the candle bases or jute rope knot.
Big Impact, Minimal Cost!
STEP 4:
Our final step it to attach the 8-12 Artificial Ficus Branches using zip ties. Be sure to flip the hula hoop upside down before you attach the branches, so that the branches hang downward.
Elegant Style Without the High Price Tag!
Who knew that a look this beautiful and polished could be so simple and budget-friendly as well? We love sharing ideas that prove gorgeous wedding décor is within reach for everyone, regardless of experience or spending limits. Being part of your wedding decorating adventure truly means the world to us. It’s always a pleasure helping turn your festive inspiration into something practical as well as magical!
Don’t forget to sign up for Rakuten to earn cash back on your online purchases. Planning a wedding is expensive, our goal is to help you stay within your budget and make every penny count. Click here to sign up for Rakuten, and RIGHT NOW when you sign up, you will receive a $10 cash welcome bonus through my link when you spend $25.00!
If you like the outcome please subscribe to our Youtube Channel for more DIY Videos and follow us on Facebook and Pinterest. Also if you need help with an upcoming project be sure to send us a project request! “Remember When Every Penny Counts, Count on MissPlanIt”